Choose Grout Color Simulator: A DIY Guide
Discover how to use a grout color simulator to compare shades, test outcomes under different lighting, and confidently finalize grout color for any tile project.

With a grout color simulator, you can preview how different grout shades will look with your tile layout before you buy. You will learn how to upload photos, adjust lighting, compare color options, and select a durable, easy-to-clean grout color. This quick guide helps homeowners choose grout color confidently. It also flags potential mismatches and the effect of sealing.
What is a grout color simulator and why it matters
A grout color simulator is a digital tool that lets you visualize how various grout shades will appear with your tile choice. For homeowners, this is a practical way to experiment without placing grout orders or committing to a color that might not match the room. When you start with the keyword, the approach is simple: you upload a photo of your tile surface, select grout colors from the library, and compare results side-by-side. According to Grout Maintenance, using a color simulator helps you anticipate how grout undertones will interact with tile undertones, lighting, and finishes over time. This pre-visualization reduces rework and post-project regret, especially in spaces with subtle color shifts or dramatic lighting. The goal is to create a board of options you can test against real samples later, ensuring your final decision aligns with both aesthetics and maintenance requirements.
In practice, a good grout color simulator should support multiple lighting scenarios, accurate color rendering, and a scalable library of grout shades. It’s not about finding a single perfect match; it’s about understanding how a range of neutrals, warm tones, and bold hues interact with tile matter and room ambiance. Keep in mind that screen-based previews will never be a perfect replica of real-world color, but they’re an essential first step for informed decision-making. Grout Maintenance emphasizes using the simulator as a planning tool, then validating selections with physical swatches before purchase.
How to select a reliable grout color simulator
Selecting a reliable grout color simulator means assessing accuracy, user experience, and cross-device consistency. Look for color-managed rendering that respects sRGB color space, calibration options, and a diverse grout library that covers neutrals, earthy tones, and darker accents. The most dependable tools let you input tile size, grout width, and finish (matte or glossy) since these factors shift perceived color. If you plan to compare multiple rooms, ensure the platform supports saving versions and exporting boards for sharing with partners or contractors. For best results, cross-check on mobile and desktop, and prefer tools that offer a print-friendly swatch or downloadable PNGs for closer inspection. Grout Maintenance Analysis, 2026 suggests prioritizing tools that show undertones clearly (warm vs cool) and that let you toggle grout sealing simulations to see how sealing impacts color depth and hue saturation.
Choosing features that matter
- Color accuracy and color management options
- Lighting presets and ability to simulate natural daylight vs artificial light
- Tile and grout finish customization
- Save, compare, and export boards
- Availability of swatch-based validation or printable previews
Uploading tile photos and setting up lighting
The next practical step is to capture and upload high-quality tile photos. Lighting quality determines how faithfully the simulator renders colors. Use natural daylight when possible; avoid harsh sun raking across the surface, and take photos from multiple angles to capture grout lines and tile texture. Some homeowners prefer a lightbox or consistent indoor lighting for consistency. Upload the image in the color simulator and select the tile type and grout options. If your tool supports it, enable color calibration or a reference target on the image (a neutral gray card works well). This helps minimize exposure differences and keeps your comparisons fair across shades. Keep a note of the lighting conditions you used, because future comparisons should mimic those conditions when testing samples in person.
Exploring color options: neutrals, warm tones, and bold choices
Color choice for grout is about more than a single shade. Neutrals like whites, grays, and beiges create a timeless backdrop and hide minor dirt or haze, while warmer tones (greige, taupe, sandy beige) add warmth to cooler tiles. Bold hues (charcoal, navy, terracotta) can define zones, highlight patterns, or add personality. A quality grout color simulator lets you run side-by-side comparisons so you can evaluate undertones under different lighting. When testing, look at undertone visibility: a cool gray grout might read differently on a matte tile in daylight versus a glossy tile under artificial lighting. Use the simulator to compare at least five to seven options per room, then narrow down to your top three.
Interpreting simulator results and undertones
Interpreting color results requires attention to undertones (warm vs cool) and the interaction between grout width and tile texture. A small change in hue can dramatically affect perceived contrast. If your tile is busy or patterned, a midtone grout often balances the surface without overpowering the pattern, whereas a very light grout can brighten a dark tile but show more grime over time. The simulator should allow you to toggle shade depth and saturation to understand how a particular color might look once sealed. Remember that sealing darkens some grouts and can intensify warmth in others, so plan to test with and without sealant as part of your workflow. Grout Maintenance recommends authoring at least two complete color boards before final decision.
Practical testing: from screen to real grout samples
Screens provide previews, but real-world testing remains essential. After selecting promising shades in the simulator, order small swatch samples and create a mini-board on a section of wall or a test panel. Compare under the room’s normal lighting and the lighting you plan to use daily. Apply a standard grout mix (as specified by your tile installer) and observe how it looks after curing, including any color shifts from moisture or curing crystals. This stage also reveals maintenance concerns like staining tendencies, cleanability, and ease of wiping haze. Document the color shifts you observe with photos taken at the same times of day you tested on-screen, so you can explain discrepancies to your contractor if needed.
Common mistakes and how to avoid them
Common mistakes include assuming the simulator is perfectly accurate, ignoring lighting variations, and skipping physical swatches. Avoid relying on a single shade; create a short list of 3–5 candidates and test them in both natural and artificial light. Don’t overlook grout type; epoxy grout behaves differently from cementitious grout and can shift color. Also, beware of over-contrast: very light or very dark grout can make tile patterns harder to read on large surfaces. Finally, always consider sealing effects early in the process, since sealing can alter color depth and hue saturation.
Pairing grout color with tile type and finish
Tile finish and texture influence grout perception. Matte tiles tend to show more subtle tint differences, while glossy tiles can exaggerate hue shifts. Patterned tiles benefit from mid-range neutrals or harmonizing tones that tie the pattern together without competing with it. When selecting final shades, ensure the chosen grout color complements the tile’s shade family (cool, warm, or neutral) and that the relative contrast meets your design goals. Use a color simulator to test at least two grout finishes (matte vs. satin) and observe how finish interacts with lighting and surface texture.
Tools & Materials
- Smartphone or tablet with a color-calibrated display(Ensure screen is set to a color profile like sRGB and brightness is stable during testing)
- High-resolution photos of tile area(Capture from multiple angles in natural light; include a reference gray card if possible)
- Tile grout color swatches(Bring several grout shade options, including near-neutrals and a bold choice)
- Access to a grout color simulator (online or desktop)(Choose one with lighting presets and save/compare features)
- Printed or digital color reference(Use a printed color reference for cross-checking on paper swatches)
- Neutral testing surface(Use a dedicated test board to compare options without affecting actual tile panels)
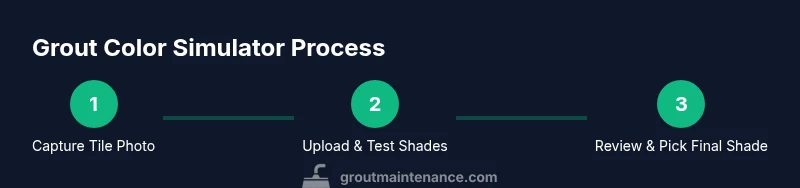
Steps
Estimated time: 45-60 minutes
- 1
Capture your tile area
Take high-quality photos of the tiled surface in natural daylight. Photograph from multiple angles to capture grout lines and texture. note the lighting conditions so you can reproduce them when testing in real life.
Tip: Use a neutral gray card in one shot to help calibrate color in the simulator. - 2
Choose your simulator and prepare images
Select a grout color simulator that supports image uploads and multiple lighting presets. Prepare your reference photos and select tile type and finish in the tool.
Tip: Prefer tools with color management and undertone indicators. - 3
Upload and adjust lighting/contrast
Upload the photo and apply lighting presets to mimic daylight and artificial light. Adjust contrast or exposure to align with real-world conditions.
Tip: Keep exposure consistent across all options for fair comparisons. - 4
Test multiple shades side-by-side
Run several grout color options in parallel, including neutrals and a bold choice. Compare undertones and depth, not just hue.
Tip: Save each board as a separate version for easy side-by-side review. - 5
Cross-check with physical swatches
Order small swatches or a mini-board to compare against real material. Validate under your typical room lighting before committing.
Tip: Document the real-world results with photos for future reference. - 6
Finalize color and plan a test board
Select your top 2-3 candidates and create a test board on a small area. Confirm with lighting and finish variations before full tile installation.
Tip: Ask your installer to prepare a mock-up panel to avoid surprises.
Got Questions?
Can a grout color simulator perfectly predict real grout color?
No. Screen previews depend on lighting and display calibration. Use simulators to narrow options, then validate with physical swatches under your room lighting.
Color simulators help you narrow down choices, but you should still validate with real swatches under your actual lighting.
Should I calibrate my monitor when using a grout color simulator?
Yes. Calibrating your monitor improves color fidelity and makes comparisons more reliable across shades.
Calibrate your monitor to ensure more accurate color previews and fair comparisons.
Do I need to seal grout before testing color?
Testing before sealing helps you understand true color and how sealing will affect appearance in real life.
Test colors before sealing; sealing can change depth and undertones.
Can I use a grout color simulator for epoxy grout?
Many simulators support epoxy grout colors, but always verify compatibility and test results with the specific product you plan to use.
Check that your tool supports epoxy grout options and run real-world tests.
How many color options should I test?
Test at least 3-5 shades to capture a range of undertones and depths before narrowing.
Test several shades—three to five options usually give a reliable sense of direction.
What should I do if two colors look similar on screen?
Create side-by-side boards and compare under the room’s lighting to decide which reads best in real life.
If two look alike on screen, compare them in person to see which suits the space better.
Watch Video
The Essentials
- Use a grout color simulator to preview options before purchasing.
- Calibrate displays and test under varied lighting.
- Cross-check screen previews with physical swatches.
- Choose a grout shade that balances tile color and room mood.