How to Remove Mold from Shower Grout: A Practical Guide
Learn proven methods to remove mold from shower grout, protect tile, and prevent recurrence with safe cleaners, scrubbing, sealing, and maintenance tips.

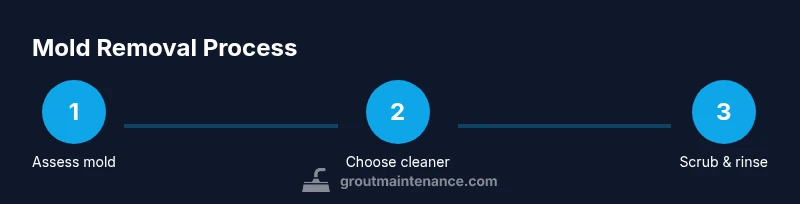
This guide shows you how to remove mold from shower grout safely and effectively. You'll identify mold, choose the right cleaner, scrub the grout, rinse thoroughly, and seal or maintain to prevent recurrence. Essential gear includes gloves, ventilation, a scrub brush, and a good cleaner; follow the steps for best results.
What mold on shower grout is and why it grows
Mold in shower grout is a fungus that thrives in damp, warm bathroom environments. It often starts as discoloration in the grout lines and can quickly spread if moisture is allowed to linger. Understanding the science helps you clean more effectively. Mold spores are microscopic and can penetrate porous cementitious grout; non-porous epoxy grout resists growth better but still needs routine cleaning. The Grout Maintenance team notes that moisture control is the foundation of long-term mold prevention: dry surfaces after each shower, fix leaks promptly, and ensure good ventilation. Regular cleaning disrupts the mold lifecycle and prevents biofilm buildup that soap, shampoo, and mineral deposits feed. If you’re looking for how to remove mold from shower grout, understanding the mold lifecycle helps you clean more effectively.
Common signs include dark green, black, or pinkish stains along grout lines and a musty odor. If you notice recurring growth even after cleaning, investigate hidden water sources such as leaking faucets, shower doors, or grout cracks where water can accumulate. By addressing moisture, you reduce the likelihood of future mold colonies taking hold.
Safety first: gear and ventilation
Before you begin, protect yourself with proper gear and create good ventilation in the bathroom. Wear rubber gloves, safety goggles, and a respirator or mask if you’re sensitive to mold spores. Open a window or run a fan to move air and reduce inhalation risk. A short vent or a dehumidifier in the room can dramatically cut moisture levels during the process. Never mix cleaners; follow label directions and keep children and pets away from the work area. According to Grout Maintenance, safe handling and thorough ventilation are as critical as the cleaning itself for preventing health risks and spreading spores.
Cleaning options by grout type
Grout comes in several formulations, and the best cleaning approach depends on whether your grout is cementitious (sand or unsanded) or epoxy, and whether it’s traditional porous grout or sealed. For cementitious grout, an oxygenated bleach or hydrogen peroxide solution can be effective against mold staining, especially on white or light-colored grout. For epoxy grout, milder cleaners and less aggressive scrubbing are typically sufficient; epoxy is more resistant to moisture and stains but still needs regular cleaning. Avoid concentrated acidic cleaners on natural stone tiles and never mix bleach with ammonia or vinegar. Always test a small inconspicuous area first and observe for color changes. Grout that’s deeply penetrated by mold may require more intensive options, including a professional assessment or grout replacement in extreme cases. By using the right cleaner for your grout type, you maximize effectiveness while protecting tile and grout integrity.
How to prevent mold recurrence: drying, ventilation, and routine care
Prevention is the best mold defense. After each shower, wipe down surfaces to remove excess moisture and allow grout lines to dry completely. Ensure the bathroom has adequate ventilation—use an exhaust fan or open a window during and after showers. Regular cleaning with a mild cleaner and a scrub brush keeps biofilm from forming. Consider a penetrating grout sealer if your grout is cementitious and has not been sealed recently; this helps water repel from the grout surface and reduces moisture absorption. For recurring mold, address hidden water sources such as leaks behind tiles or under the shower pan. A routine maintenance schedule, including a quarterly deep clean, will keep grout looking fresh and mold-free.
When to call a professional for mold in shower grout
If mold covers large areas, penetrates behind walls, or keeps returning despite cleaning, professional assessment is warranted. Technicians can identify hidden moisture sources, replace severely damaged grout, or regrout where necessary. Persistent mold in epoxy grout may indicate substrate moisture issues or inadequate ventilation that require a licensed contractor. If you suspect toxic mold exposure or respiratory sensitivity, seek professional help promptly. Grout Maintenance recommends pursuing a tailored assessment when DIY steps don’t resolve the issue.
Authority sources
- https://www.epa.gov/mold/mold-remediation-schools-and-homes
- https://www.cdc.gov/mold/default.html
- https://www.osha.gov/mold
These sources provide official guidelines on mold awareness, indoor air quality, and safety considerations during remediation. Always cross-check product labels and local regulations when choosing cleaners and sealants.
Common mistakes and misconceptions
- Relying on a single cleaning method: mold can hide in porous grout and reappear after a quick scrub. - Using bleach on colored grout can bleach colors or degrade grout over time. - Skipping drying time after cleaning can leave residual moisture that invites quick mold rebound. - Sealing grout immediately after cleaning before it’s fully dry can trap moisture and cause mold to thrive behind the sealant.
Tools & Materials
- Protective gloves(Nitrile or rubber gloves; avoid latex if sensitive)
- Safety goggles(Wraparound style preferred)
- Respirator or mask(N95 or equivalent for mold spores)
- Ventilation source(Exhaust fan or open window)
- Spray bottle(For applying cleaners evenly)
- Scrub brush (stiff-nosed)(Grout brush or old toothbrush for corners)
- Sponge and microfiber cloth(For rinsing and drying)
- Bucket(Optional for diluted cleaners)
- Mild cleaner options(Hydrogen peroxide 3%, oxygen bleach, or commercial grout cleaner)
- Vinegar or baking soda(Used for mild cleaning or odor control)
- Sealant (penetrating grout sealer)(Choose matte finish for residential showers)
- Fan or dehumidifier(Helps with drying after cleaning)
Steps
Estimated time: 45-60 minutes for a standard shower; longer for extensive mold or larger showers
- 1
Prepare area and safety gear
Clear the shower space and remove any rugs or accessories. Put on gloves, goggles, and a mask. Ventilate the room with a fan or open window to minimize inhalation of spores.
Tip: Test a small area first to confirm the cleaner won’t discolor grout. - 2
Identify grout type and mold extent
Check whether your grout is cementitious or epoxy, and whether the mold stains are surface or embedded. This helps you choose the right cleaner and avoid damaging grout.
Tip: Cementitious grout is more porous; epoxy grout resists moisture better but still benefits from cleaning. - 3
Choose a cleaner and apply
Fill a spray bottle with the selected cleaner (hydrogen peroxide for general mold, oxygen bleach for white grout). Apply generously to grout lines and let sit for 5–10 minutes for penetration.
Tip: Never mix cleaners. Bleach and vinegar produce hazardous fumes when combined. - 4
Scrub moldy grout
Use a grout brush or an old toothbrush to scrub along the grout lines, focusing on visible mold. Apply additional cleaner if needed and continue scrubbing until stains fade.
Tip: Work in small sections to maintain moisture control and prevent drying too quickly. - 5
Rinse and dry thoroughly
Rinse with clean water and wipe with a microfiber cloth. Dry the area completely using a fan or dehumidifier to prevent re-growth.
Tip: Do not leave damp surfaces overnight in humid bathrooms. - 6
Assess persistence and repeat if necessary
If stubborn mold remains, repeat the cleaner application and scrubbing. For persistent cases, consider a second treatment with a stronger cleaner or consult a professional.
Tip: Limit repeat treatments to avoid grout damage; do not over-saturate. - 7
Seal grout after complete drying
If your grout is cementitious and unsealed, apply a penetrating grout sealer following the product instructions after the grout is completely dry.
Tip: Sealants require 24–48 hours of dryness before exposure to moisture. - 8
Establish ongoing maintenance
Incorporate a weekly wipe-down routine and a quarterly deep clean to keep mold at bay. Address any moisture sources promptly.
Tip: Keep a moisture control routine as part of regular bathroom maintenance.
Got Questions?
Is bleach the best cleaner for mold on grout?
Bleach can be effective on non-colored, cementitious grout, but it may discolor colored grout and isn't always the best option for deeply embedded mold. Use hydrogen peroxide or grout cleaners for sensitive tiles and colors. Always test first.
Bleach can help some grout, but test first and consider gentler options for colored grout or embedded mold.
Can vinegar remove mold from shower grout?
Vinegar can help with some surface mold but is less effective on established or deeply embedded mold. Do not mix with bleach. Use as a lighter option or odor control, not as a sole solution for heavy mold growth.
Vinegar can help surface mold but isn’t reliable for deep or persistent growth.
How long does sealing grout last after cleaning?
Durability depends on the grout type and traffic; penetrating sealants often last 1-2 years with proper care. Reapply as needed if water no longer beads on the surface.
Sealing lasts about 1-2 years with good care; reapply when water stops bead-ing.
What if mold keeps returning after cleaning?
Recurrent mold usually signals ongoing moisture issues. Check for leaks, poor ventilation, or inadequate drying. If needed, consider professional assessment or regrouting.
If mold comes back, moisture is the culprit—check leaks and ventilation, and consider a professional evaluation.
Does epoxy grout resist mold better than cementitious grout?
Epoxy grout resists mold better due to its non-porous nature, but it still needs cleaning and proper ventilation. Regular maintenance remains essential.
Epoxy grout resists mold but still needs cleaning and airflow.
Can I use steam cleaning for shower grout mold?
Steam can help loosen grime but may introduce moisture into porous grout. Use cautiously and ensure grout is sealed and surfaces can dry fully afterward.
Steam can help but be sure grout dries afterward to avoid more mold.
The Essentials
- Identify mold and moisture sources early.
- Choose grout-type appropriate cleaners and follow safety rules.
- Thorough drying is essential to prevent recurrence.
- Seal cementitious grout after it’s fully dry for added protection.
- Regular maintenance minimizes future mold problems.