Fixing Broken Grout Lines: A Homeowner's Guide
Urgent guide to diagnose, repair, and prevent broken grout lines in tile installations. Learn quick fixes, best practices, and prevention tips from Grout Maintenance.

Broken grout lines are usually caused by substrate movement or moisture intrusion. Start by cleaning the joints, removing loose grout, and regrouting (epoxy grout is ideal for wet zones). If cracking continues, inspect substrate stability and consider tile replacement. For persistent issues, consult a professional to prevent further damage.
What broken grout lines reveal about your tile system
According to Grout Maintenance, broken grout lines are more than a cosmetic annoyance. They signal underlying issues that can compromise your tile installation if ignored. The Grout Maintenance team found that even small cracks can widen with daily use, typically allowing water to seep behind the surface. Moisture behind grout is a primary driver of substrate degradation, which in turn accelerates tile looseness and additional cracking. In moisture-prone areas like showers and backsplashes, these joints act as a barrier; once compromised, the entire wall or floor can suffer. Early attention to broken grout lines can save you money and prevent mold growth, floor instability, and more extensive repair work in the future.
As you inspect, note whether cracks are isolated or spread across larger areas. Pay attention to adjacent tiles—loose tiles nearby usually indicate a bigger problem than a single cracked joint. If you see discoloration, soft spots, or a musty odor, treat the situation as urgent. Addressing the issue promptly is essential to maintaining a durable, leak-free tile surface and keeping your home safe from hidden moisture damage.
blockTypeName?null=null}
Common causes of broken grout lines
There are several common culprits behind broken grout lines. Substrate movement or foundation settlement can shift tiles enough to crack the grout, especially after heavy loading or seasonal expansion and contraction. Water intrusion through joints can weaken the cementitious matrix, leading to brittleness and crumbling. Poor initial installation, like inadequate grout depth or improper curing, often makes joints susceptible to cracking with normal use. Harsh cleaners or acidic spills can degrade grout over time, widening existing cracks. In outdoor areas, freeze-thaw cycles and UV exposure can also degrade grout faster than indoor installations. The combination of moisture, movement, and aging grout typically results in the most visible broken grout lines.
Understanding these causes helps you choose the right repair approach and materials for your specific environment, whether it’s a shower stall, kitchen backsplash, or tile floors. For example, high-moisture zones benefit from epoxy grout due to superior water resistance, while drier areas may perform well with cement-based grout if properly sealed.
blockTypeName?null=null}
Visual signs and clues you shouldn’t ignore
Not all grout issues look the same, but several telltale signs point to underlying problems. Hairline cracks near the grout lines may appear cosmetic at first but can widen rapidly if moisture or movement is present. Missing chunks or crumbling grout indicate that the joint has lost integrity and needs immediate attention. Staining or dark spots along grout joints often signal trapped moisture and possible mold growth behind the tiles. Loose tiles are a red flag that the grout has failed to hold the substrate in place; this often means a more extensive repair is needed beyond regrouting. In any of these cases, identify the affected area’s exposure to water and plan a repair approach that restores both appearance and function while addressing the root cause.
In high-humidity bathrooms or basements, even small cracks can become problems if not treated, because moisture can wick into the mortar and lead to substrate deterioration. Remember: broken grout lines can worsen quickly if left untreated, so prioritize a timely diagnosis and repair plan.
blockTypeName?null=null}
Safe inspection and initial assessments
Begin with a visual survey of all grout joints in the affected area. Use a dental pick or a grout removal tool to probe the joints gently; if the grout crumbles easily, it’s a sign of compromised integrity and should be removed before regrouting. Check for visible mold, musty odors, or soft spots in the substrate behind the grout to evaluate moisture exposure. Use a flashlight to inspect behind shower grout lines, as water intrusion is a major enemy of grout lifespan. If tiles feel loose or hollow when pressed, that indicates substrate movement or adhesive failure that needs professional attention. When in doubt, perform a cautious removal of damaged grout only in small sections to test the extent of damage without creating unnecessary mess or exposing underlying layers to moisture.
The Grout Maintenance team recommends documenting all affected joints with photos and notes. This helps you compare before/after results and provides a clear reference if you hire a pro later. Prioritize areas exposed to direct water spray and high foot traffic, where damage tends to progress fastest. Finally, ensure after-drying that the surface is clean and dust-free before applying new grout to promote proper adhesion.
blockTypeName?null=null}
Repair options: regrout, replacement, and materials
Repairing broken grout lines usually falls into two main pathways: regrouting the existing joints or replacing tiles where necessary. Regrouting is typically faster and less disruptive, especially when grout damage is limited to surface joints. It’s important to use the appropriate grout type for your environment: cement-based grout with good sealing for drier rooms, or epoxy grout for areas with high moisture exposure such as showers. If tiles are loose, cracked, or the substrate is compromised, tile replacement or substrate repair may be required. For cracked tiles, you’ll need to decide whether to replace individual tiles or perform a more extensive retiling of a section. Color-matching grout is a common concern—if you’re aiming for a seamless look, you may opt for a color that closely resembles the existing grout. The key is selecting grout that provides adequate water resistance, shrinkage control, and durability for your specific scenario.
In showers and wet rooms, epoxy grout’s resistance to staining and water penetration can prevent future issues, though it does require careful mixing and curing. If you’re unsure about your skill level or the extent of the damage exceeds simple grout replacement, consider hiring a professional to ensure proper substrate assessment and long-term durability. Grout sealing after repair is essential to reduce future moisture infiltration.
blockTypeName?null=null}
Maintenance and prevention: extending grout life
After repairing broken grout lines, establish a routine that minimizes future damage. Regular cleaning with pH-neutral cleaners helps preserve grout integrity, while avoiding harsh acids and bleach on cement-based grout prevents premature deterioration. Seek to seal grout joints after curing, especially in wet areas, to slow moisture ingress. Maintain proper ventilation in bathrooms to reduce humidity levels, which in turn reduces the risk of mold growth and grout cracking associated with moisture exposure. For outdoor or frequently used surfaces, schedule periodic resealing and inspection to catch early signs of wear. Keep an eye on expansion joints and movement that may affect the tiles—address movement promptly to prevent a cycle of recurring cracks.
The Grout Maintenance approach emphasizes proactive maintenance as the best defense against repeat issues; a quick repair followed by a maintenance plan will typically yield longer-lasting results and preserve the tile system’s integrity.
blockTypeName?null=null}
When to call a pro and what to expect
If you observe persistent cracking, significant substrate movement, or tile loosening, it’s prudent to call a professional. A licensed contractor can assess structural movement, moisture intrusion, and substrate integrity, delivering a tailored repair plan. Expect an evaluation that may include moisture testing, substrate inspection, and possibly tile removal to reach the deeper layers. A pro can recommend the best grout type—epoxy versus cement-based—based on the moisture level, usage, and expected life span of your installation. The key is to choose a contractor who understands moisture control, proper curing, and long-term maintenance to prevent recurrence of broken grout lines. Early professional input can save you from larger, costlier repairs later and ensure your tile system remains durable and attractive.
blockTypeName?null=null}
Steps
Estimated time: 1-2 hours
- 1
Gather tools and prep area
Collect grout removal tools, putty knife, sponge, grout float, and chosen grout type. Protect adjacent tiles with painter’s tape and lay down drop cloths to minimize mess. This initial setup reduces cleanup time later and keeps the project moving.
Tip: Have water handy for rinsing and a separate container for waste grout. - 2
Remove damaged grout
Carefully score and remove only the damaged grout in the affected joints. Work in small sections to avoid disturbing healthy grout. Clean out the joints so they are free of dust and debris before applying new grout.
Tip: Use a grout removal tool with a carbide blade for faster, cleaner removal. - 3
Clean joints and inspect substrate
After removing damaged grout, clean the joints thoroughly and dry them. Check for any loose tiles or signs of moisture behind the grout. If you see moisture, address it before proceeding to prevent recurrence.
Tip: Check for mold and treat any growth before regrouting. - 4
Apply new grout
Mix grout to the manufacturer’s instructions and press it into joints with a grout float. Remove excess grout promptly and smooth joints for a uniform finish. Allow grout to set according to product guidelines.
Tip: Avoid over-watering cement grout during cleaning to prevent shrinkage. - 5
Seal and cure
After the grout has cured, apply a grout sealer suitable for your grout type and area. This helps resist moisture and stains. Revisit the area periodically to ensure sealing remains intact and perform any final touch-ups if needed.
Tip: Follow curing times precisely for best results.
Diagnosis: Visible cracks or gaps in grout between tiles, water seepage, and loose tiles.
Possible Causes
- highSubstrate movement or foundation settlement
- highMoisture intrusion through grout joints leading to mortar degradation
- mediumPoor installation or aging grout that has become brittle
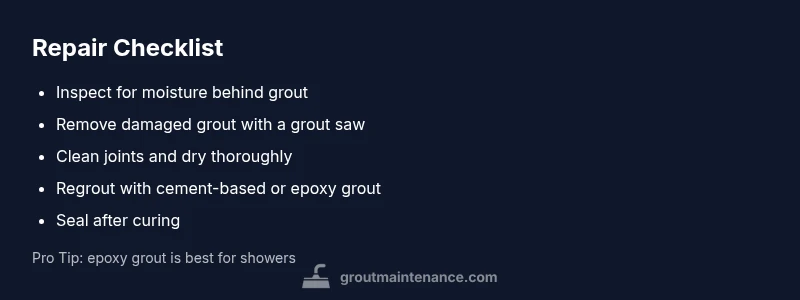
Fixes
- hardInspect for movement and, if present, address structural issues; regrout after stabilizing
- mediumRemove damaged grout and regrout using cement-based or epoxy grout
- easySeal joints after curing to prevent moisture ingress
- hardReplace damaged tiles if grout damage has undermined tile adhesion
Got Questions?
How can I tell if grout is beyond repair?
Look for deep, widening cracks, loose tiles, or crumbling grout. If moisture or mold is behind the grout, or if tiles feel hollow, the problem may require structural assessment and professional intervention. Often, regrouting suffices for minor damage, but larger issues indicate deeper issues.
If you see big cracks, loose tiles, or mold behind the grout, you may need a professional to assess structural problems.
DIY regrout or hire a pro?
For small, clean cracks in non-wet areas, DIY regrouting is feasible with careful prep and sealing. In showers or large areas with movement, hiring a pro is safer and more likely to yield a long-lasting result.
Small DIY fixes work, but in showers or when movement is involved, a pro is a smarter choice.
Is epoxy grout better for moisture-prone areas?
Epoxy grout offers superior water resistance and stain resistance, making it a good choice for showers and frequent-wet zones. It’s harder to work with and can be more expensive, but durability is higher in moist environments.
Epoxy grout is tougher against moisture and stains, ideal for showers, though harder to apply.
How long does regrouting take?
A small bathroom or a few tiles may take 1-2 hours of active work, with additional cure time as recommended by the grout manufacturer. Larger areas can take several hours across multiple sessions.
Most regrouting projects finish in a few hours, with curing times varying by grout type.
When should I replace tiles instead of regrouting?
If tiles are cracked, adhesive is failing, or the substrate behind the grout is damaged, replacement is often the best long-term solution. Persistent movement also calls for professional evaluation.
If tiles are loose or cracked or the substrate is damaged, replacing tiles is usually the best option.
Should I color-match grout for a seamless look?
Color matching can improve aesthetics, but ensure the shade chosen still tolerates moisture and cleaning agents. In high-traffic or wet areas, a durable, moisture-resistant grout color is crucial.
A good color match looks seamless, just make sure it’s the right durable grout for your area.
The Essentials
- Inspect early to prevent larger repairs
- Choose grout type suitable for moisture exposure
- Seal and maintain after repair to extend life
- Call a pro if movement or persistent cracking occurs