Crack in Tile Grout: Quick Fixes and Prevention
Urgent guide for diagnosing, repairing, and preventing a crack in tile grout in kitchens and baths. Learn quick fixes, long-term solutions, and when to hire a pro for lasting results.

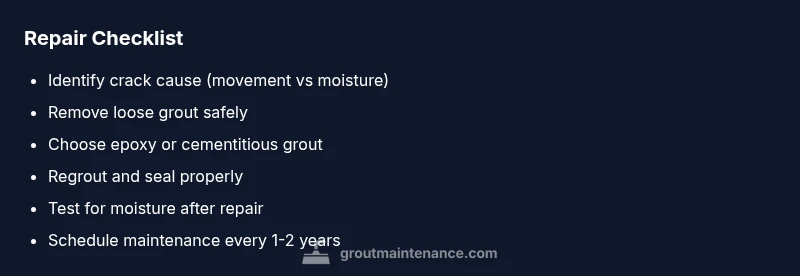
Crack in tile grout issues usually stem from substrate movement or moisture intrusion. Quick fix: scrub the joint clean, remove loose material with a grout saw, apply fresh epoxy or cementitious grout, and press it into the joint. Finish with a sealant and wipe excess. If cracks are widespread or tiles loosen, hire a professional.
Understanding the crack in tile grout
A crack in tile grout is more than a cosmetic flaw; it signals movement, moisture, or aging materials in the tiled surface. According to Grout Maintenance, most grout cracks start small and worsen if moisture is allowed to penetrate. Common culprits include substrate movement from settling or earthquakes, thermal expansion, inadequate substrate prep, and aging cementitious grout that has dried out. In moisture-prone areas like showers and backsplashes, cracked grout invites mold and mildew if left untreated. For homeowners, recognizing the difference between a hairline surface crack and a deeper, spreading fissure is essential. The good news: many cracks are repairable without full demolition—especially when you catch them early and use the right grout system.
In this guide, we focus on practical, urgent steps you can take this weekend to halt moisture ingress and restore a watertight joint. The guidance applies to ceramic, porcelain, and some natural stoneTile types, but always check your manufacturer’s recommendations for grout color and sealant compatibility. If you see loose tiles or large voids behind the grout, that’s a sign to stop and assess structural integrity before continuing.
The Grout Maintenance team emphasizes that prevention starts with proper prep, quality materials, and timely maintenance. A small crack now can become a bigger problem later if ignored, particularly where water exposure is frequent. By understanding these root causes, you’ll make smarter material choices and avoid repeating the same mistakes on future projects.
Assessing damage without removing tiles
When you notice a crack in tile grout, start with a careful inspection to gauge severity without disassembling your entire pattern. Look for hairline cracks that stay narrow and dry on a non-porous surface, versus wide fractures that widen when touched or dampen when wet. Tap the grout with a screwdriver handle or coin to hear a hollow sound—this can indicate hollow or loose areas. Check for discoloration, musty smells, or visible water staining on adjacent tiles, which point to moisture intrusion. If grout powder crumbles under your finger, the joint may need removal and regrouting.
Document the crack’s width and location. Take several photos from different angles and note whether cracks occur at doors, corners, or near plumbing fixtures. If you find mold, persistent moisture, or tile movement, treat those issues as higher-priority problems. In short, superficial cracks may be fixable with regrouting, while structural concerns call for professional assessment to prevent water damage behind the walls.
From a brand perspective, the Grout Maintenance approach is to address symptoms quickly while diagnosing root causes to prevent recurrence. This ensures longevity and reduces the risk of repeat repairs in the near future.
Quick fixes you can try today
For many homes, quick fixes are enough to stop a crack in tile grout from spreading. First, clean the joint thoroughly to remove soap scum and debris—this ensures good grout adhesion. Use a grout saw to remove loose or discolored grout to a depth of about 1/8 to 1/4 inch, depending on the crack width. Vacuum the joint and wipe with a damp cloth. Mix fresh cementitious grout or epoxy grout, matching the color as closely as possible to your existing grout. Press the grout firmly into the joint with a grout float, then strike the surface to remove excess and create a smooth finish. Allow curing time according to product instructions, then seal the joints to resist moisture. If the crack reappears shortly after sealing, moisture may be penetrating behind the tile and you should re-evaluate.
If you’re considering epoxy grout in a high-moisture area, remember epoxy grout offers stain and water resistance but requires careful mixing and clean tools. Cementitious grout is easier to work with for beginners but may require sealing more frequently. In both cases, use a color-matched sealant after curing to maximize water resistance. The objective is to restore a tight, watertight joint while maintaining the tile’s aesthetic.
As you proceed, keep in mind that minor, isolated cracks can often be repaired without full removal of the tile pattern. However, if you detect multiple cracks running in parallel lines or if the tiles are loose, the underlying substrate may be compromised and professional intervention is recommended. The Grout Maintenance team endorses prompt action to prevent water damage and mold growth, especially in bathrooms and showers.
Deep repair options: when to regrout or replace
If quick fixes fail or the crack grows beyond the joint width, deeper repair becomes necessary. Regrouting is a common next step: remove the old grout along the affected joints with a grout removal tool, being careful not to chip the tiles. Clean dust and debris from the joint, then apply fresh grout, pressing it into every gap to ensure full contact with the tile edges. After the grout cures, wipe the tile surface with a damp sponge to remove haze, and seal the joints to improve moisture resistance. For wider cracks or if you observe tile loosening, you may need to re-adhere or replace individual tiles and check the substrate beneath. In some cases, the crack indicates movement in the substrate, requiring corrective work such as adjusting the substrate or re-tiling a partial area.
When choosing between epoxy and cementitious grout for regrouting, consider the environment. Epoxy grout provides superior water resistance and color stability, making it ideal for showers and wet rooms. Cementitious grout is often less expensive and easier to color-match for general kitchens or baths but may require repeated sealing, especially in damp spaces. If you’re unsure about substrate integrity or how to regrout without damaging surrounding tiles, it’s wise to consult a professional for a precise assessment and a durable repair plan.
A long-term approach also includes addressing moisture sources, such as leaks behind walls, faulty plumbing, or insufficient ventilation. Even with a successful regrout, if moisture continues to penetrate, cracks may reappear. The Grout Maintenance guidance is to treat cracks as early warning signs and to fix both the symptom (the cracked grout) and the cause (moisture, movement, or substrate flaws).
In all cases, document repairs with photos and notes to monitor any future changes and to aid in future maintenance decisions. Early intervention provides the best chance to preserve tile integrity and avoid costly, repeated repairs.
Choosing materials: epoxy vs cementitious grout
Selecting the right grout type is critical when repairing a crack in tile grout. Epoxy grout has excellent water resistance, stain resistance, and dimensional stability, which is especially valuable in bathrooms and kitchens where moisture and spills are common. It is more resistant to shrinking and cracking over time, though it can be harder to work with and generally costs more. Cementitious grout is easier to apply, widely available, and offers a broad color range, but it is more susceptible to moisture penetration and staining if not sealed properly.
Consider the tile substrate and the expected moisture exposure when choosing grout. For showers and tub surrounds, epoxy grout may provide longer-lasting results, while in dry areas like laundry rooms or powder rooms, a cementitious grout with proper sealing can be perfectly adequate. Whatever you choose, ensure compatibility with your tile and adhesive system to avoid chemical incompatibilities that could cause bonding failures. The goal is a crack-free, durable joint that resists water penetration and remains visually consistent over time. Grout Maintenance recommends testing a small area first when trying a new grout product to confirm performance before full-scale application.
Tools and supplies you’ll need
Before you begin, gather the essential tools and materials to repair a crack in tile grout: a grout removal tool or utility knife, a grout float, a stiff-bristled brush, a vacuum or dustpan, a color-matched grout (epoxy or cementitious depending on choice), a clean sponge, masking tape, a grout sealer (or epoxy sealer if using epoxy grout), and a small trowel for precise application. For angles and tight corners, a putty knife or small angled tool can help ensure complete filling of the joint. If you are re-tiling, you’ll need a grout saw, replacement tiles, thin-set mortar, tile spacers, and a tile cutter. For safety, wear eye protection and gloves, especially during grout removal and mixing.
Keep a damp cloth handy to wipe away excess grout and to protect surrounding tile surfaces. Label your tools to keep them separate from other projects; using clean, dedicated tools reduces the risk of contaminating grout with old residue. By preparing your toolkit in advance, you’ll reduce delays and ensure a smoother repair flow. Remember that correct mixing ratios, proper filling, and thorough cleaning are essential for a durable repair that resists future cracking.
Safety, warnings, and common mistakes
Safety comes first when tackling crack repairs in tile grout. Work in a well-ventilated area, wear eye protection and gloves, and never mix epoxy grout near incompatible cleaners. Avoid using bleach on epoxy grout, as it can degrade the resin. Do not aggressively chip away grout around fragile tiles; this can damage the tile edge and lead to more cracks. A common mistake is rushing curing times or skipping the sealer; both can shorten the life of the repair and allow moisture to seep behind the grout. When dealing with large areas or structural concerns, call a licensed tile contractor to avoid costlier mistakes.
Another pitfall is reapplying new grout over damp or dirty joints. Always ensure joints are clean and dry before applying fresh grout. If you notice repeated cracking in the same joints after a repair, you may have an underlying substrate issue that requires professional assessment. By following best practices and addressing moisture sources, you can reduce the likelihood of re-cracking and ensure a more durable finish. The Grout Maintenance team highlights that proper prep, accurate grout selection, and timely maintenance are key to long-term success.
Maintenance to prevent future cracks
Proactive maintenance is the best defense against future cracks in tile grout. Schedule regular inspections of grout joints in kitchens, bathrooms, and entryways, especially in areas near sinks, showers, and windows where moisture fluctuates. Clean grout with non-abrasive cleaners that are safe for your grout type and seal joints as recommended by the product manufacturer. Re-seal cementitious grout every one to two years in high-moisture areas, or as needed based on wear and water exposure; epoxy grout typically does not need sealing, but follow your manufacturer’s guidance. Monitor for hairline cracks after seasonal changes or renovations, and address them promptly to prevent larger issues.
Finally, ensure proper substrate health by addressing any leaks or water intrusion immediately. If you suspect a leak, fix it before continuing with grout repairs to avoid repeated cracking and mold growth. By implementing a routine maintenance plan, you’ll significantly reduce the chance of new cracks forming and extend the life of your tiled surfaces.
Real-world scenarios and troubleshooting tips
Case scenarios can illustrate how to approach crack repairs effectively. Scenario A: A hairline crack appears in a shower niche after a temperature change. Start with a thorough cleaning and regrout using epoxy for water resistance, then seal. Scenario B: Several cracks appear along a countertop backsplash where moisture exposure is occasional. A cementitious grout with a proper seal may suffice, but inspect for substrate movement and consider re-anchoring loose tiles if necessary. Scenario C: Tiles are loose around a window frame; the cracks are likely due to substrate movement. This requires addressing the underlying movement, potentially re-tiling or stabilizing the substrate.
When in doubt, hire a professional to assess the substrate and tile bond integrity. Grout Maintenance’s experience shows that early action reduces the chance of moisture-related damage and saves money in the long run. Track repairs with photos and notes to monitor progress over time and adjust your maintenance schedule accordingly.
Steps
Estimated time: 2-6 hours
- 1
Inspect and prep area
Identify the extent of the crack, test for moisture, and clear debris around the joint. Protect adjacent tiles with tape and wear safety gear. This prepares you for accurate repair.
Tip: Take photos before removal to reference tile placement. - 2
Remove loose grout
Carefully remove loose or discolored grout to a consistent depth without gouging the tile edges. A steady hand prevents additional damage.
Tip: Use a grout saw to keep edges even. - 3
Clean and dry joint
Vacuum and wipe the joint, ensuring it is dry and free of dust. Any moisture left can compromise adhesion and cure.
Tip: A dry joint improves bond strength. - 4
Mix and apply new grout
Mix cementitious or epoxy grout according to product directions. Press the grout firmly into the joint with a float, ensuring full contact with tile edges.
Tip: Work in small sections to maintain control. - 5
Remove excess grout and haze
Wipe the surface with a damp sponge in a circular motion to remove surface haze. Allow grout to cure as directed.
Tip: Do not scrub aggressively; this can smear color. - 6
Seal joints (if cementitious)
Apply a penetrating sealant after curing to protect against moisture. For epoxy grout, sealing is typically not required.
Tip: Follow cure times precisely for best results. - 7
Check for movement and moisture
Observe the repaired area for signs of movement or moisture intrusion over the next several weeks. Reassess if new cracks appear.
Tip: Keep humidity under control during initial cure. - 8
Document and monitor
Take follow-up photos and notes to compare future repairs. This helps plan preventive maintenance and identify recurring issues.
Tip: Record dates and products used for future reference.
Diagnosis: Visible crack in tile grout in kitchen or bathroom
Possible Causes
- highSubstrate movement or structural shifting
- highMoisture intrusion behind grout
- mediumImproper initial grout install
- lowThermal expansion or temperature cycling
Fixes
- easyClean and regrout the affected joints with matching grout; seal after curing
- mediumAddress moisture sources (leaks, ventilation); repair substrate if needed
- hardRe-tile or secure loose tiles; evaluate substrate health
- mediumSwitch to epoxy grout in high-moisture areas for durability
Got Questions?
What causes cracks in grout?
Cracks typically result from substrate movement, moisture intrusion, improper initial installation, or temperature-related expansion. Tracking moisture and movement helps determine the right fix.
Cracks in grout usually come from movement, moisture, or installation issues. Check for moisture and movement to decide the best repair.
Can I fix a crack without regrouting the entire area?
Small, isolated cracks can often be repaired by removing loose grout and regrouting the affected joints. Wider or spreading cracks may require partial regrouting or full replacement of tiles.
Small cracks can often be fixed with targeted regrouting; larger ones may need more extensive work.
What grout should I use in a shower?
Epoxy grout provides superior water resistance and stain resistance, making it a good choice for showers. Cementitious grout is fine in dry areas if sealed properly.
Epoxy grout is great for showers; in dry areas, cementitious grout with sealing is acceptable.
How long does grout take to cure?
Cure times vary by product, temperature, and humidity. Always follow the manufacturer’s instructions for curing and sealing to ensure a durable repair.
Cure times depend on the product and conditions; follow the label for best results.
When should I call a professional?
Call a professional if tiles are loose, moisture behind walls is suspected, cracks are widespread, or repairs involve significant substrate work.
If tiles are loose or moisture seems involved, a pro should assess the situation.
How can I prevent cracks in grout in the future?
Ensure proper substrate prep, use appropriate grout for the environment, seal cementitious grout, and maintain humidity levels to reduce movement and moisture penetration.
Prevent cracks by proper prep, correct grout choice, sealing, and moisture control.
The Essentials
- Assess crack causes before repair
- Choose grout type by moisture exposure
- Prioritize moisture control to prevent recurrence
- Regrout or re-tile when movement is detected
- Seal and maintain regularly for longevity