What grout do you use for pool coping? A practical guide to durable pool edges
Discover what grout to use for pool coping, including cementitious and epoxy options, with prep, sealing, and maintenance tips from Grout Maintenance.

To answer what grout do you use for pool coping, this guide compares cementitious and epoxy options, explains prep, mixing, and sealing steps, and offers maintenance tips. It highlights water resistance, movement tolerance, and color options to help you pick the right grout for outdoor pool coping and ensure lasting performance.
What grout do you use for pool coping
If you're asking what grout do you use for pool coping, the best answer is to choose a grout specifically rated for water exposure and outdoor use. According to Grout Maintenance, coping sits at the waterline, endures splashes and chemicals, and expands/contracts with temperature changes. This means you should prioritize water resistance, low porosity, and good bonding to both tile and concrete substrates. Epoxy grout and cementitious grout are the two main routes, each with pros and cons. Epoxy grout offers superb chemical resistance and stain resistance, while cementitious grout is simpler and cost-effective if you seal and maintain it properly. In outdoor pool environments, you should also consider UV stability and colorfastness. For many DIYers, starting with a high-quality cementitious grout labeled for exterior or pool use is a reliable path, and upgrading to epoxy only if you need superior water resistance and durability.
Factors that influence grout choice for pool coping
Several factors steer grout selection for pool coping. Water exposure at the coping edge, pool chemical use, substrate movement, climate, and tile type all influence performance. Porosity matters; lower-porosity grouts resist staining and water absorption better. Movement joints between coping and tiles require a grout with good elasticity or a proper backer rod and caulking at expansion joints. Freeze-thaw cycles in cold climates demand a grout with appropriate density and sealing. Colorfastness matters for matching or accenting pool finishes. Finally, cost and available maintenance will shape your final choice. Grout should also be compatible with your sealer and grout release products.
Cementitious grout vs epoxy grout for pool coping
Cementitious grout is easy to mix, widely available, and budget-friendly. When used outdoors, it should be sealed to improve water resistance, and you’ll need routine maintenance to keep it looking fresh. Epoxy grout resists chemicals, water, and stains and generally performs better in wet environments, but it requires specialized mixing, tools, and longer cure times. Installation for epoxy grout is more forgiving of minor surface imperfections, but cleanup and grouting require careful handling and PPE. Your decision should weigh total cost, installation complexity, maintenance, and long-term durability. Grout Maintenance notes that in many pool projects, epoxy grout offers superior longevity, especially where water chemistry fluctuates.
Preparing pool coping surfaces before grouting
Effective grouting starts with clean, dry surfaces. Remove old grout and loose debris from the joints using a grout saw or rotary tool. Rinse thoroughly, then allow the coping to dry completely. A moisture-free surface improves adhesion and reduces efflorescence. For outdoor pool coping, ensure the tile edges and mortar joints are solid and free of crumbling concrete. If you see cracks in the substrate, repair them before grouting. Mask adjacent areas to avoid grout smears on glass, stone, or concrete surfaces. A damp, not wet, surface is ideal for cementitious grout; epoxy grout may tolerate a slightly different surface condition but still benefits from surface prep.
Mixing and applying grout correctly
Follow the product’s instructions for mixing, aiming for a lump-free, peanut-butter-like consistency that stays on the float. Work small sections at a time, forcing grout into joints with a diagonal swipe. Remove excess grout before it skins over and causes a haze. Clean tools frequently to minimize setup time. For epoxy grout, the mix ratio and working time are shorter, so prepare a small working area and wear PPE. Grout color consistency is crucial for a uniform finish, and you might choose a color that matches the tiles or creates contrast with the coping.
Sealing and curing for pool grout
Sealing cementitious grout is essential for outdoor, water-exposed pools. Apply a penetrating sealer after the grout has cured to the manufacturer’s recommended tolerance. Do not seal too early; curing times vary by product and weather. Epoxy grout requires no sealing in many cases, since its resin matrix already provides water resistance, but some installations still benefit from a grout release or sealant compatible with epoxy. Keep animals and heavy traffic away during cure, and maintain proper chemical balance in the pool to maximize grout life.
Maintenance and troubleshooting for pool grout
Regular cleaning with non-acidic cleaners helps prevent staining and mildew. Avoid harsh chelators that can degrade grout; instead, use pH-balanced cleaners, a soft-bristle brush, and a non-abrasive pad. If you notice mildew or dark spots, treat promptly, and re-seal if you used cementitious grout. Efflorescence—white powder—can occur in outdoor grouts and is easier to prevent than remove. If joints crack, assess substrate movement and consider re-grouting or caulking expansion joints. Grout maintenance benefits from routine inspection and timely repairs.
Color and texture considerations for pool coping
Choosing grout color affects the overall look of pool coping. Light-colored grouts can reveal stains and require more frequent cleaning, while dark grouts can hide wear but show less contrast with white tile. Sanded grout is typically used for wider joints and can impact texture; unsanded is better for small joints. Always test color samples beside the pool edge before full application, and consider a grout color that complements both the tile and the coping material. Grout render and color sealing products can help protect and refresh the finish over time.
Common mistakes and how to avoid them
Avoid using too much water during cleanup, which can cause haze and discoloration. Skipping surface preparation leads to poor adhesion and cracking. Not following cure and seal times results in reduced water resistance and staining. Mixing cementitious grout with epoxy cement ratio or vice versa creates an unusable product. Ensure you’re using the correct grout type for pool coping and never mix products not rated for water exposure. Grout Maintenance finds that patience during curing yields better long-term results.
A practical maintenance plan for year-round pool care
Create a seasonal plan that includes surface cleaning, acid or chlorine balancing, and re-sealing as needed. Outdoor pool coping benefits from periodic re-sealing every 1-3 years depending on sun exposure and chemical use. For epoxy grout, schedule minor touch-ups as needed to maintain color and polish. Keep spare grout products on hand, especially if you plan to re-grout sections that experience higher wear. A simple calendar reminder can help maintain consistency and prevent long-term damage.
Tools & Materials
- Grout float (rubber edge)(for pressing grout into joints)
- Mixing bucket(for cementitious grout or epoxy prep)
- Grout sponge(for cleaning excess grout during final wipe)
- Cleaning brush / stiff bristle(to prep joints and remove debris)
- Sealant or grout sealer(penetrating sealer for cementitious grout; optional for epoxy)
- Caulking gun and sealant for expansion joints(maintains movement joints)
- Masking tape / painter's tape(protects adjacent surfaces)
- Gloves and eye protection(protects skin during mixing and cleaning)
- Grout saw or oscillating tool(removes old grout)
- Water container for clean tooling(keep tools clean during work)
- Epoxy grout kit (only if using epoxy)(include resin, hardener, colorant)
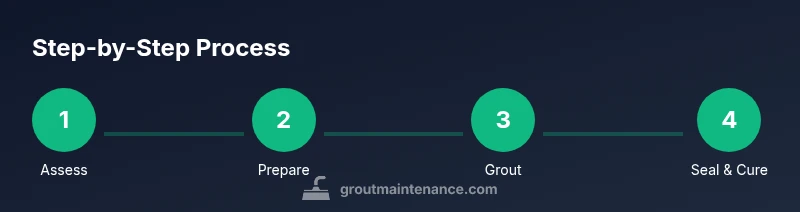
Steps
Estimated time: Active work 60-120 minutes; cure times vary by product (24-72 hours for cementitious, ~24 hours for epoxy)
- 1
Assess and prepare the workspace
Inspect the coping, clean joints, and remove loose material. Define the grout type and color before starting. Ensure dry, clean surfaces for best adhesion and finish.
Tip: Take photos and mark any cracks for later repair. - 2
Mix the grout according to the product
Follow manufacturer instructions to achieve a smooth, pliable consistency. For cementitious grout, avoid over-watering; for epoxy, ensure proper mixing ratio and working time.
Tip: Work in small sections to prevent skinning over. - 3
Pack the grout into joints
Use the grout float to press grout diagonally across joints, ensuring complete filling and removal of air pockets. Maintain a slight bevel to help water shedding.
Tip: Check joints with a straight edge to confirm full depth. - 4
Smooth the joints and remove excess
Scrape off excess grout while it’s still pliable, then wipe with a damp sponge to avoid haze. Allow a short initial set before final cleaning.
Tip: Wipe in a diagonal motion to prevent streaks. - 5
Cure and wait before sealing or water exposure
Follow product guidance for cure times; cementitious grout typically requires sealing after curing, while epoxy grout may not require sealing.
Tip: Keep the area dry during cure and protect from foot traffic. - 6
Seal cementitious grout after cure
Apply a penetrating sealer uniformly on all joints to improve water resistance and stain resistance. Re-seal based on product guidance and wear.
Tip: Test a small area first to gauge finish. - 7
Inspect and touch up as needed
Check for missing pockets of grout and re-work them promptly. Clean any haze and inspect expansion joints for movement. If needed, re-seal after touch-ups.
Tip: Keep spare grout color handy for touch-ups. - 8
Final cleanup and return to service
Rinse surfaces thoroughly, remove tape, and restore pool balance. Do not expose grout to pool water until cured as recommended by the manufacturer.
Tip: Document the process for future maintenance.
Got Questions?
Can I use standard indoor grout on outdoor pool coping?
Outdoor pool coping requires grout rated for water exposure and weather; standard indoor grout may deteriorate with sun, water, and chemicals. Consider cementitious exterior grout or epoxy grout for longer life.
Outdoor pool coping needs water-resistant grout; indoor grout is not recommended outdoors.
What’s the difference between cementitious and epoxy grout for pools?
Cementitious grout is easier and cheaper but requires sealing and more maintenance; epoxy grout resists chemicals and water better but is harder to work with and costlier.
Cementitious is easier; epoxy lasts longer in wet pools.
How long should pool grout cure before use?
Cementitious grout typically cures in 24-72 hours before exposure to heavy use; epoxy grout often cures within 24 hours but follow the product's label for exact times.
Cure times vary; check your product label.
Do I need to seal epoxy grout?
Epoxy grout usually does not require sealing because of its resin matrix, but some installations may benefit from a compatible sealer depending on usage.
Epoxy grout usually doesn’t need sealing, but check product guidance.
How can I fix cracked grout at pool coping?
Small cracks can sometimes be repaired by removing damaged grout and re-grouting with matching material; larger substrate movement may require re-grouting and addressing the underlying cause.
Small cracks may be fixed by re-grouting; bigger issues need repair.
Watch Video
The Essentials
- Choose the right grout rated for water exposure
- Prepare surfaces thoroughly before grouting
- Follow cure times and seal if using cementitious grout
- Maintain grout regularly for best longevity