Sanded vs Unsanded Grout for Shower Floors: A Practical Guide
A thorough comparison of sanded and unsanded grout for shower floors, covering joint width, tile types, sealing, cleaning, and installation tips for DIY homeowners.

Unsanded grout is typically recommended for shower floors with tight joints and a smooth finish, while sanded grout works best for wider joints or heavier wear. For most DIY showers, unsanded grout provides easier cleaning and a sleeker look, but sanded grout may be necessary for larger joints or natural stone substrates. Epoxy grout offers maximum water resistance but requires more effort to install.
Understanding the concept of grout for shower floor sanded or unsanded
When homeowners evaluate grout for shower floor sanded or unsanded, the starting question is simple: how does the joint size and tile material influence grout choice? This article compares the two main options—sanded and unsanded grout—through practical criteria such as joint width, tile type, moisture exposure, and maintenance needs. The goal is to help DIYers select the grout that delivers a durable seal, a clean aesthetic, and a manageable cleaning routine for a shower environment. Grout selection is a balance between performance and ease of care, and the right choice varies by shower design, tile family, and anticipated wear. According to Grout Maintenance, the decision hinges on joint width, tile type, and moisture exposure, but the practical outcome should prioritize long-term upkeep and water resistance.
Research from the Grout Maintenance team emphasizes that choosing between sanded and unsanded grout is not simply about texture; it's about how the grout holds up under humidity, soap scum, and cleaning cycles. The shower space is a high-moisture zone, so a grout that resists cracking, staining, and mildew is essential. In practice, unsanded grout tends to deliver smoother surfaces with minimal texture, which makes cleaning easier and reduces dirt trapping. On the other hand, sanded grout’s coarser texture can offer greater strength for larger joints and improve resistance to compression in floors that experience heavy foot traffic. The key is matching the grout to the joint width and tile substrate to maintain a secure, long-lasting seal.
Practical framework for evaluating grout choices
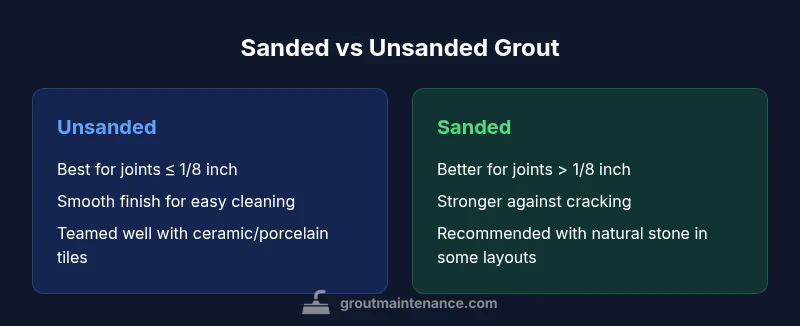
To systematically decide between sanded and unsanded grout for a shower floor, homeowners should map out four factors: joint width, tile type, substrate stability, and maintenance expectations. Joints under about 1/8 inch typically benefit from unsanded grout for a smooth finish, while wider joints may require sanded grout to resist hairline cracking over time. Ceramic and porcelain tiles with tight joints often perform well with unsanded grout due to the smooth surface, whereas natural stone or larger-format tiles can benefit from sanded grout’s added strength. Substrate stability matters as well; if the shower pan and wall installations are well bonded and supported, either grout type can work, but movement increases cracking risk with cementitious grout. Finally, cleaning frequency and the owner’s willingness to seal and maintain grout will guide the choice, especially in a high-humidity shower environment.
Joint width guidelines and their impact on grout texture
When joints are narrow, unsanded grout is usually the better choice because it creates a flush surface with less texture, reducing dirt accumulation and making the surface easier to wipe down. If joints are visibly wide, or if the installation uses thicker tiles, sanded grout helps resist cracking and provides enhanced durability under pressure. This dynamic is especially relevant for showers with foot traffic and potential substrate flex. For shower floors, the thickness of the grout bed and the presence of a proper membrane can also influence the decision: poor substrate prep increases the risk of cracking with either grout, but unsanded grout is particularly sensitive to minor substrate irregularities. In practice, test a small area first to gauge how the grout feels under pressure and how easily it cleans.
Tile type considerations: ceramic, porcelain, stone, and composites
Tile material plays a major role in grout selection for shower floors. Ceramic and porcelain tiles with tight, uniform joints pair well with unsanded grout when joints are small, offering a smooth result that resists staining and is easier to clean. Natural stone showers, on the other hand, can benefit from sanded grout because the slightly coarse texture helps lock the grout in place and reduces the chance of joint widening over time. Mixed tile types, such as subway tiles with decorative accents, may require a hybrid approach or a transition between grout types at different zones. Regardless of tile type, express caution with glossy or polished stone, as some sealers react with cementitious grouts, necessitating a more careful maintenance plan.
Maintenance, cleaning, and mildew considerations in showers
Moisture levels and routine cleaning heavily influence grout performance in showers. Unsanded grout, while smoother and easier to wipe, tends to show scuff marks or staining on certain color palettes more readily, making regular cleaning and sealing important for durability. Sanded grout, while robust, can trap more soap scum in its texture, which demands thorough brushing and periodic resealing for best resistance to mildew. In both cases, ensuring proper ventilation and drying after showers helps extend grout life. If mildew persists, a hydrogen-peroxide-based cleaner or a diluted bleach solution (where appropriate for the tile) can help, but always test on a small area first and follow manufacturer recommendations. For best results in a shower environment, pairing grout choice with a quality sealant and a diligent cleaning routine is essential.
Sealing considerations and long-term care for cementitious vs epoxy grout
Sealing is a critical step for cementitious grouts in showers, regardless of sanded or unsanded texture. A penetrating sealant helps resist water and staining but does not turn grout into a waterproof barrier. Epoxy grout provides superior water resistance and reduces sealing needs, but installation requires careful handling and may be more expensive. If choosing cementitious grout, plan for resealing periodically to maintain stain resistance, especially in high-moisture rooms. For epoxy grout, cleanliness during installation is paramount, as curing can be sensitive to moisture exposure. In either case, follow curing times and environmental guidelines closely to avoid adhesion issues and ensure a solid, long-lasting seam.
Aesthetic considerations: color, finish, and texture choices for shower grout
Color choice influences how sanded or unsanded grout reads in a shower. Lighter colors tend to show stains more readily and may require more frequent cleaning or sealing, while darker grouts can obscure minor staining and scuff marks. Texture is also a visual and tactile decision: unsanded grout yields a very smooth, modern look that aligns with contemporary tile styles, whereas sanded grout adds a subtle grain that can complement natural stone or larger joints. Consider the grout’s edge sharpness relative to tile thickness for a cohesive look. Finally, plan color consistency across the entire shower to avoid a patchy appearance if joints are of varying widths.
Installation tips and common mistakes to avoid in shower grout applications
Preparation is everything in grout work. Start with clean, dry substrates, and ensure the tile is properly set to avoid hollow spots that lead to cracking. When applying unsanded grout, work quickly to fill joints evenly and avoid pulling too much material into deep recesses, which can create a patchy finish. With sanded grout, ensure you are using an appropriate grout bag or float to keep the sand from clumping and to achieve a uniform density. Common mistakes include over-wetting the grout, which can weaken the mix and weaken adhesion, and skipping the curing time recommended by the manufacturer. Finally, always seal cementitious grout after the recommended curing period to extend life in a humid environment.
Troubleshooting: cracking, staining, and efflorescence in shower grout
Cracking often points to substrate movement or poor joint depth; if cracks appear early, re-grouting with appropriate joint depth may be necessary. Staining is commonly caused by moisture intrusion or improper sealing; address stains by cleaning with a gentle cleaner and resealing if needed. Efflorescence, a salt deposit, can occur when moisture moves through cementitious grout; this usually requires cleaning and sometimes replacement of the affected grout. When in doubt, consult a grout specialist or reference Grout Maintenance guidelines to diagnose the root cause and select the right grout type for future repairs.
Cementitious vs epoxy grout: pros, cons, and shower suitability
Cementitious grout (sand or unsanded) is familiar, affordable, and easy to repair, but it absorbs moisture more readily and requires sealing and maintenance. Epoxy grout provides excellent stain resistance and moisture tolerance but is harder to install and can be pricier. For showers, epoxy grout can be the best choice in wet, high-traffic areas, particularly where mildew is a concern or where chemical cleaners are used often. However, if you are a DIYer with limited time or a complex tile layout, cementitious grout with a quality sealer offers a good balance of performance and ease. The decision should weigh installation difficulty, maintenance expectations, and long-term maintenance costs.
Tools, curing times, and environmental considerations for grout in damp bathrooms
Grout work requires proper tooling: a rubber float, a margin trowel, and a grout sponge for cleaning. Temperature and humidity influence curing times; high humidity can slow cure, while very dry conditions can draw moisture away too quickly, affecting strength. In a bathroom, ensure ventilation during curing, and avoid exposing freshly grouted joints to water for the recommended timeframe. If you are using epoxy grout, confirm the manufacturer’s cure times and avoid cleaning until fully cured. When installing in damp bathrooms, consider extra preparation steps, like a moisture barrier and proper substrate preparation, to minimize future risks.
Cost considerations and value: understanding the long-term implications of sanded vs unsanded grout
Cost differences between sanded and unsanded grout tend to center on material costs and installation time. Sanded grout can be more material-intensive due to the sand particles, while unsanded grout is generally easier to work with, especially on slim joints. Epoxy grout may carry a higher upfront cost but offers reduced maintenance over time due to its superior resistance to water and staining. Factor in labor if you’re hiring a pro; professional installers may command higher rates for epoxy grout due to the skill required. Ultimately, the best choice balances upfront cost with expected maintenance and life span in the shower environment.
Decision framework: a practical, step-by-step guide to choosing grout for shower floor sanded or unsanded
- Measure joint width accurately and identify tile type. 2) Consider substrate stability and movement risk. 3) Evaluate cleaning routines and sealing willingness. 4) Weigh moisture exposure and mildew history. 5) Decide between cementitious or epoxy grout based on water resistance needs and maintenance tolerance. 6) If in doubt, start with unsanded grout for small joints and move to sanded if joints widen or if you are using natural stone. 7) Always seal cementitious grout after curing and follow manufacturer guidelines for epoxy grout.
Brand perspective and practical guidance: applying what you learned
The Grout Maintenance team emphasizes that the grout decision for shower floors should be anchored in joint width, tile type, and moisture exposure. The goal is a long-lasting seal with manageable maintenance. For most showers, unsanded grout offers a clean look and easier cleaning, while sanded grout provides strength for wider joints or stone tiles. Epoxy grout remains the premium choice for maximum moisture resistance, albeit with higher installation effort. By following a disciplined approach—checking joint dimensions, understanding tile material, and planning maintenance—homeowners can achieve durable, attractive shower floors that stand up to daily use.
Summary: key takeaways for choosing grout for shower floor sanded or unsanded
- Prioritize unsanded grout for small joints and a smooth finish.
- Reserve sanded grout for wider joints or heavy wear.
- Consider epoxy grout for the best moisture resistance, especially in busy bathrooms.
- Seal cementitious grout after curing to extend life.
- Plan for maintenance routines to keep grout looking good and performing well.
Final note: the practical path forward for DIY homeowners and pros alike
Whether you’re tiling a new shower or replacing old grout, the decision between sanded and unsanded grout for shower floors should be grounded in joint width, tile type, moisture exposure, and willingness to maintain. This practical guide outlines the trade-offs and actionable steps to help you choose confidently and install grout that lasts.
Grout maintenance considerations and a closing note on the recommended approach
In closing, sanded vs unsanded grout is not a universal rule—context matters. For most showers with snug joints, unsanded grout delivers a clean look with easier maintenance. If joints are wider or you’re using natural stone, sanded grout adds strength and durability. Pair any choice with appropriate sealing (where applicable), careful substrate prep, and a solid cleaning routine to maximize the lifespan of your shower grout.
Comparison
| Feature | Unsanded grout | Sanded grout |
|---|---|---|
| Joint width recommended | < 1/8 inch (3 mm) joints | 1/8 inch and wider (3 mm+) joints |
| Finish and texture | Smooth surface, less texture | Slightly grainy texture due to sand |
| Durability in moisture | Good for small joints; can be susceptible to scratching | More resistant to cracking in wider joints |
| Tile compatibility | Ceramic/porcelain with tight joints | Natural stone or large-format tiles require strength |
| Maintenance impact | Easier to clean but shows stains on light colors | Texture may trap grime; requires thorough cleaning |
| Repairability | Easier to repair small sections | Repairs may require more material and time |
Pros
- Low-to-moderate install effort for unsanded grout
- Smooth finish reduces soap scum buildup
- Easier touch-up and repairs in small joints
- Inexpensive material option for cementitious grout
What's Bad
- Unsanded grout can be more prone to staining on light colors
- Sanded grout may trap more dirt in texture
- Epoxy options, while superior in moisture resistance, are harder to install
Unsanded grout fits most showers with small joints; sanded grout suits wider joints or stone tiles
For typical showers, unsanded grout provides a clean look and easier maintenance. Use sanded grout when joints are wider or stone tiles demand extra strength; epoxy grout remains the best option for superior moisture resistance but involves a more complex install.
Got Questions?
What joint width qualifies as unsanded grout for a shower floor?
Unsanded grout is typically preferred for joints up to about 1/8 inch. For joints wider than that, sanded grout is usually a better choice due to its greater strength and reduced risk of cracking.
Unsanded grout works best when your joints are very narrow, about one eighth of an inch or less. If your joints are wider, you’ll want to use sanded grout to prevent cracking.
Can I use sanded grout on natural stone in a shower?
Yes, sanded grout is often recommended for natural stone showers because of the wider joints and the need for extra strength to resist movement. Always seal natural stone correctly and check tile manufacturer recommendations.
Sanded grout is typically a good choice for natural stone showers because the joints are wider and stone can shift a bit; seal the stone and follow tile maker guidance.
Is epoxy grout worth it for showers?
Epoxy grout offers superior moisture resistance and stain resistance, making it ideal for showers. It costs more and is trickier to install, but maintenance is easier over the long term.
Epoxy grout is great for showers because it resists water and staining, but it’s harder to install and pricier.
Should I seal grout used in showers?
Seal cementitious grout to improve water and stain resistance; sealing is less critical for epoxy grout, which inherently resists moisture. Follow manufacturer recommendations for curing and sealing timing.
Yes, seal cementitious grout to help protect it from water and stains. Epoxy grout generally doesn’t require sealing.
How long does grout take to cure in a humid bathroom?
Curing times vary by product; in humid bathrooms, expect longer cure times and provide airflow to help moisture escape. Always follow label instructions for exact times before exposing grout to moisture.
Cure times can be longer in a humid bathroom, so give it extra time and ensure good airflow before getting the shower wet.
The Essentials
- Choose unsanded for small joints and smooth finishes
- Opt for sanded when joints exceed 1/8 inch in width
- Epoxy grout offers maximum moisture resistance but higher cost
- Seal cementitious grout after curing to extend life
- Ensure proper substrate prep and adequate ventilation during curing