Grout Gun Screwfix: A Practical Guide for DIY Tile Projects
A practical buying guide to grout guns on Screwfix, covering selection tips, tool specs, maintenance, and buying strategies for DIY tiling with cement-based and epoxy grout.

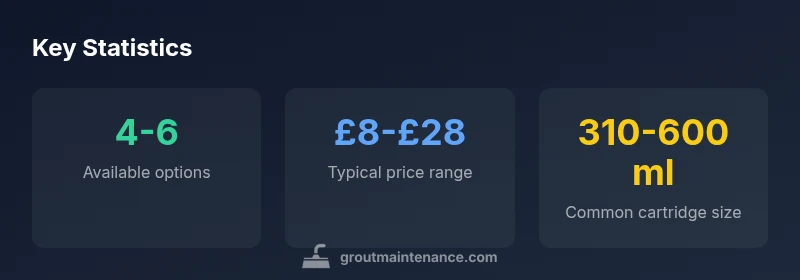
Grout guns sold by Screwfix are a practical option for applying grout in DIY tile projects. For most home work, a standard 310–600 ml cartridge grout gun with a comfortable grip and compatible nozzles delivers consistent flow. According to Grout Maintenance, match the gun size to your grout cartridge and choose a model with a smooth trigger for long jobs.
Understanding grout guns and Screwfix availability
Grout guns are handheld dispensers designed to push premixed grout or epoxy grout into tile joints. They help you control flow and reduce mess compared to spatulas and brushes. Screwfix stocks a variety of models, from compact 310 ml units to larger 600 ml or bigger capacity guns, plus nozzle sets and seals. According to Grout Maintenance, the right grout gun starts with the grout type and cartridge size. Cement-based grout demands moderate pressure and consistent plunger movement, while epoxy grout can be thicker and more resistant to setting, which may require a sturdier gun and specific nozzles. When selecting from Screwfix, look at trigger action (smooth vs. heavy pull), grip comfort, weight, and whether you can fit common nozzles. If you’re tiling a small bathroom, a light, 310 ml gun might be sufficient; for a kitchen splashback or floor tiling, a mid-range 310–600 ml model can keep your work pace steady. Finally, verify compatibility with the nozzle sizes you expect to use and whether the gun accepts universal adapters. The combination of the right size, comfortable handle, and compatible accessories is what makes grout application predictable and less tiring over long sessions.
How grout guns work and what to look for in a model
Grout guns operate by a trigger-activated plunger that pushes grout from a cartridge through a nozzle. They deliver a controlled bead along joints as you guide the nozzle along the grout line. Key features to evaluate include cartridge size, compatibility with standard 310–600 ml cartridges, material (metal bodies tend to be more durable than plastic), and the quality of the seal at the plunger rod to minimize leakage. A reliable unit uses a piston or segmented plunger that provides consistent pressure, even as the grout becomes thicker near the end of a cartridge. The trigger mechanism should offer a smooth, fatigue-free pull and a ratcheting option can help maintain control when you’re applying grout for long runs. Consider nozzle types: straight, angled, and multi-nozzle sets, plus compatibility with common screw-on adapters. Ergonomics matter—look for a soft-grip handle, balanced weight, and a trigger with adjustable tension if you’ll use the tool for extended periods. Finally, evaluate whether the tool is rated for epoxy grout, since some epoxy formulations require stronger materials or coatings to resist chemical attack. With the right model, you’ll achieve uniform bead width and clean edges without gaps or squeezes.
Selecting grout guns for different grout types and project sizes
Choosing a grout gun depends on grout type and project size. For cement-based grout in typical home tiling, a mid-range 310–600 ml cartridge gun provides adequate flow and control for most walls and floors. For larger areas or denser formulas, a 600–1500 ml model reduces reloads and keeps you moving. Epoxy grout is more viscous and often demands an epoxy-rated gun and robust nozzle set to prevent clogging. In tight spaces or small bathrooms, a compact 150–310 ml model can work, but you’ll trade some efficiency for maneuverability. When buying at Screwfix, compare weight, trigger tension, and nozzle compatibility, and check the availability of replacement parts like seals and plungers. If you’re new to grouting, choose a flexible model that accepts a broad range of cartridge sizes and nozzles so you don’t outgrow your tool quickly. Proper selection translates to cleaner joints, fewer wipe-offs, and a more predictable bead for every joint.
Screwfix buying tips: brands, specs, and practical checks
From a buying perspective, focus on three pillars: compatibility, ergonomics, and maintenance. Start by verifying that the gun accepts the cartridge sizes you plan to use—most DIY grout cartridges fall in the 310–600 ml range, but some projects benefit from larger formats. Next, evaluate ergonomics: a cushioned grip, balanced weight, and a trigger with adjustable tension reduce hand fatigue on long jobs. Materials matter—metal-bodied guns tend to be more durable in heavy use, while high-quality plastics help keep weight down. Check nozzle compatibility and the availability of common nozzle sizes (straight and angled). Finally, consider maintenance access: can you easily replace seals, plungers, and O-rings? Screwfix typically carries matching accessories and replacement parts, which reduces downtime. If you’re unsure, start with a reliable mid-range model, and purchase a basic nozzle kit as an add-on. Remember, the tool can make the difference between a fast, neat job and a sloppy finish. Grout cleanliness also improves with a compatible sponge, rag, and a little patience as you wipe between joints.
Maintenance and best practices to extend tool life
Proper maintenance extends the life of your grout gun and preserves performance. Rinse the gun thoroughly with water or appropriate solvent immediately after use to remove residual grout, especially with epoxy formulations. Remove the cartridge and clean the nozzle and threads to prevent dried grout from jamming the mechanism. Wipe down the exterior and lightly lubricate the plunger rods or seals with manufacturer-approved lubricant if recommended. Store the gun with the nozzle cap on or with a dummy cartridge to protect the seal from dust. Inspect O-rings, seals, and plungers for wear and replace worn parts promptly to avoid leaks. If you encounter a hard-to-push trigger, check for cartridge compatibility and clear any partial blockages in the nozzle. Finally, plan ahead: keep spare O-rings and seals on hand so you’re not stuck mid-project. Consistent maintenance reduces downtime and helps you achieve the clean, even bead that grout work requires.
Practical workflow: from prep to finish with a grout gun
Here’s a concise workflow you can apply to a typical DIY tiling project. Prep work: clean joints, vacuum dust, and lay out your grout color and tools. Load the cartridge or bulk grout into the gun, then prime by pulling the trigger gently to release air. Apply grout along the joints with steady, uniform pressure, guiding the nozzle to keep a consistent bead. Wipe off excess grout with a damp sponge before it hardens, and inspect joints for voids or gaps. After finishing, remove the cartridge, clean the gun, and perform a final wipe-down. If you’re using epoxy grout, follow the manufacturer’s curing time and post-cleaning guidance. With practice, you’ll develop a smooth rhythm that minimizes cleanup and yields professional-looking joints.
Comparison of grout gun size compatibility
| Gun Type | Grout Type Compatibility | Recommended Cartridge Size |
|---|---|---|
| Standard cartridge gun | Cement-based and epoxy grout (with proper nozzles) | 310-600 ml |
| Heavy-duty grout gun | Epoxy grout with larger joints | 600-1500 ml |
| Small hand grout gun | Cement-based grout in small projects | 150-310 ml |
Got Questions?
Is a standard caulking gun suitable for applying grout?
Not typically. A grout gun is designed for steady, controlled bead application of grout, while a caulking gun is optimized for sealants and can struggle with the thickness and consistency of grout. For best results, use a grout-specific tool.
A grout gun is the right tool for grout; a regular caulking gun is usually not ideal for grout application.
What size grout gun should I buy for a typical home project?
A mid-range 310–600 ml cartridge gun covers most walls and floors in DIY tiling. For larger spaces, consider 600–1500 ml. Epoxy grout may require a specialized gun.
Most homes do fine with a 310–600 ml gun, and you can upgrade if you’re tackling a big area.
Can I use epoxy grout with a standard grout gun?
Yes, but you must ensure nozzle compatibility and a gun rated for epoxy. Epoxy is thicker and can clog less-performant tools, so check manufacturer guidance.
Epoxy grout is doable with a grout gun, just pick the right model and nozzles.
Is Screwfix the best place to buy grout guns?
Screwfix offers a range of grout guns, with accessible return policies and accessory options. Compare features and read specs to ensure compatibility with your grout type.
Screwfix is convenient and has a broad range, but compare specs and read reviews.
What maintenance steps extend grout gun life?
Rinse after use, clean nozzle and threads, inspect seals, and store with the nozzle capped. Replace worn O-rings and seals promptly to prevent leaks.
Clean it well after each use and check seals regularly to keep it working smoothly.
Are manual vs pneumatic grout guns different for DIY tiling?
Manual guns are common for DIY work and require no compressor. Pneumatic guns suit high-volume tasks but need an air supply and safety considerations.
For most home tiling, a manual grout gun is sufficient; pneumatically powered tools are overkill for small jobs.
“Choosing the right grout gun isn't about brand prestige; it's about fit, flow consistency, and ergonomics that keep you working without fatigue.”
The Essentials
- Match grout type to gun capacity for best results
- Check nozzle compatibility before buying
- Prioritize ergonomics and maintenance
- Use 310–600 ml for most DIY projects