What Size Grout Trowel to Use: A DIY Guide
Learn how to choose the right grout trowel size for your tile project. Practical sizing guidelines, step-by-step tips, and common mistakes to avoid, so you get clean, even grout lines every time.

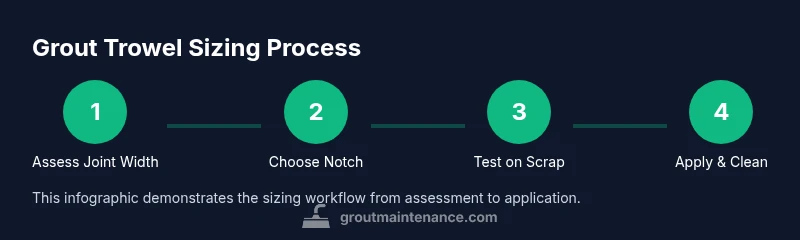
To choose the right grout trowel size, start with your grout joint width and tile size. Match the notch to the joint: use a finer notch for narrow joints and a wider notch for wider joints or large-format tiles. Always follow the tile manufacturer’s guidance and test on a scrap area before committing to a full install.
Why the right grout trowel size matters
Choosing the correct grout trowel size is a foundational step in any tile installation. The notch size determines how much grout you push into each joint and how cleanly the surface will finish. Using too large a notch on narrow joints can gouge grout lines and pull grout out of slots, while too small a notch on wide joints may leave thin, chalky lines and require multiple passes. The goal is a snug, consistently filled joint with minimal cleanup, a result that looks professional and lasts. In this guide we address what size grout trowel to use, why notch choice matters, and how to adapt sizing for different tile layouts. I’ll also show you a practical decision framework you can apply on any project, whether you’re tiling a backsplash, shower curb, or floor. The guidance here reflects practical, homeowner-friendly methods from Grout Maintenance to help you achieve durable, attractive grout lines.
For context, the question what size grout trowel to use often comes up with DIY tile projects, and the short answer is: size the notch to the joint width and tile arrangement, then verify with a test patch before committing to the whole area. This aligns with best practices in the industry and is a common-sense approach that reduces rework and grout haze later on.
Key factors that determine notch size
Notch size is the primary variable in grout application. The notch shape and width control how much grout is deposited and how well it fills the joints. Tile type and layout, joint width (whether narrow, standard, or wide), and tile format all influence your choice. Roughly speaking, smaller joints and intricate layouts benefit from finer notches, while larger joints and large-format tiles can tolerate wider notches without sacrificing control. The goal is to create a grout profile that seats cleanly into the joint without gouging or leaving gaps. In practice, you’ll balance two goals: enough grout to fill the joint fully and a surface that wipes clean without leaving excess haze. Always test a scrap piece or inconspicuous area first to confirm your sizing choice before you grout the entire installation.
Translating joint width to a notch decision
Translating joint width into notch choice is about matching the notch’s depth and width to the joint. If the joint is narrow, a fine notch will deposit a small bead of grout that you can easily press into the joint and remove excess without dragging grout over the tile faces. For wider joints, a broader notch helps you push grout more efficiently into the gap and reduce the risk of incomplete filling. In practice, many homeowners compare two or three notch options on scrap tile to see which one produces the best balance of fill, bead height, and ease of cleanup. Remember, the notch you select should create a slightly rounded grout surface that’s easy to trowel and wipe clean without dragging cement over the tile glaze.
Additionally, consider tile size. Large-format tiles tend to pair with wider notches to prevent under-filled joints, while smaller tiles with tight layouts benefit from finer notches. When in doubt, start with a mid-range notch and adjust based on your test results. The goal is consistent grout depth across all joints and a uniform surface that doesn’t require excessive cleanup.
How to measure joints and tiles accurately
Accurate measurement is the backbone of choosing the right trowel size. Start by measuring or verifying joint width with a caliper or a small ruler across several joints in the same area, since joints can vary slightly in a real-world install. Note the average joint width and how much grout you want protruding above the tile surface. For tiles with flat edges and deep grout lines, a slightly deeper notch can help fill the joints evenly. When tiles are surrounded by trim, corners, or uneven edges, test a few patches in those zones. Also check tile texture; a very smooth surface tends to reveal more grout haze, so you may prefer a trowel that deposits a bit more grout to ensure complete filling before wiping.
If you’re new to grouting, practice on a scrap tile or sample board. This gives you a chance to visually compare how different notches fill the joint and how much cleanup you’ll face after wiping. The test patch helps you lock in one notch size before tackling the whole project and can save you a lot of headaches later on.
Common mistakes when choosing a trowel size
A frequent error is overestimating the joint width and selecting a notch that’s too wide. This leads to excessive grout pulling and a sloppy appearance. Another mistake is using the same trowel across areas with different tile sizes; large-format area tiles may require a different notch from decorative mosaics or small tiles. Additionally, not testing with the actual grout product can surprise you—some pre-mixes flow differently and may require a slightly different tension or depth to fill joints completely. Before you grout the entire project, perform a test patch on a couple of joints in a discreet area to observe grout flow, fill, and surface texture. Finally, remember to keep your trowel edges clean; dull or nicked notches will create inconsistent beads and more cleanup work.
Testing and confirming before large-area application
Always perform a controlled test patch with the chosen notch on the actual grout you’ll use. Apply grout to a small sample area using the selected notch, and then wipe with a damp sponge to observe how well the joint fills and how clean the tile faces stay. If you see undersized beads, you may need a slightly larger notch; if you see too much mortar squeezed onto the tile, switch to a smaller notch. Document your results and apply the winning notch size to the rest of the area. Testing helps you avoid rework and reduces the risk of unsatisfactory grout lines across your entire project.
For a thorough test, grout a handful of joints with your chosen notch, then observe finish quality after wipe-clean and cure times. This pragmatic step is a proven way to prevent surprises and ensure consistent results across the installation.
Cleaning, curing, and finishing after grouting
Grouting is a two-step process: fill the joints and then clean the tile surface to remove any grout haze. After you apply the grout with your chosen notch, hold the trowel at a slight angle and work the grout into the joints with steady pressure to avoid gaps. Use a grout float to press the grout into the joints, then wipe away excess with a damp sponge in a diagonal motion. Allow the grout to cure according to manufacturer instructions, and then perform a final wipe to remove haze. If haze remains after curing, use a polished, clean cloth to buff the surface gently. Proper cleaning and curing ensure the joints stay strong and the tile surface remains pristine for years to come.
In summary, choosing the right grout trowel size is not only about aesthetics but also about durability. A notch that’s too large or too small can compromise joint density and lead to cracking or mold growth over time. Adhering to a tested notch size and following the manufacturer’s guidance will help you achieve professional-looking grout lines that stand up to daily use.
Epoxy grout vs cement grout sizing considerations
Epoxy grout behaves differently than cement-based grout, and the recommended trowel notch can vary. Some epoxy grouts require a slightly different approach to ensure full joint filling and to minimize haze, since epoxy’s viscosity can differ from cementitious grout. If you’re using epoxy grout, verify the notch size guidance provided by the epoxy grout manufacturer, and perform a dedicated test patch as you would with cement grout. Cement grout generally tolerates a broader range of notch sizes, but the same principle applies: the notch should match joint width and tile layout to minimize cleanup and ensure full joint filling. Remember to use appropriate PPE and ventilated space when mixing epoxy grout and to follow curing times precisely for the best results.
Quick reference cheat sheet and guidelines
- Start with joint width and tile size to choose notch size.
- Test two notch options on scrap tile before committing.
- Use a grout float to press grout into joints; wipe with a damp sponge.
- For wide joints, use a wider notch; for narrow joints, use a finer notch.
- Verify curing times and haze removal steps per product instructions.
- If in doubt, consult tile manufacturer guidelines and the Grout Maintenance resources for practical advice.
Tools & Materials
- Notched grout trowel(Select notch size based on joint width and tile type; consult tile manufacturer guidance.)
- Grout float(Use to press grout into joints after troweling.)
- Bucket with clean water(Rinse tools and wipe joints as you work.)
- Sponge(Use damp sponge for first wipe and smoothing; follow with a final wipe.)
- Rubber gloves(Protect hands from moisture and grout dust.)
- Rags or towels(Cleanup around edges and spills as needed.)
Steps
Estimated time: 25-40 minutes
- 1
Choose the notch size based on joint width
Measure a few joints to determine the average width, then select a notch that will deposit a comfortable bead without overfilling the joint. This initial selection sets the stage for consistent results across the project.
Tip: When in doubt, pick a middle-ground notch and test on scrap tile first. - 2
Prepare tiles and joints
Wipe down the tile faces to remove dust. Ensure joints are clean and dry before applying grout, since dust or moisture can affect adhesion and color.
Tip: A clean surface prevents grout haze from forming late. - 3
Load grout onto the trowel and apply
Load a bead of grout on the notched edge and hold the trowel at a slight angle to work the grout into the joints. Work in small sections to keep the grout fresh and avoid setting before you can press it into the joints.
Tip: Maintain steady pressure for even density and reduce air pockets. - 4
Scrape and consolidate grout into joints
Use the grout float to press grout into each joint, cleaning the surface as you go. Ensure joints are filled to the desired depth without overfilling.
Tip: Angle the float slightly to avoid dragging grout across tile faces. - 5
Initial clean-up wipe
Wipe the tile surface with a damp sponge in a diagonal motion to remove excess grout and haze while allowing joints to set.
Tip: Rinse the sponge often to prevent redistributing grout. - 6
Final cure and haze removal
Allow grout to cure per manufacturer guidelines, then perform a final haze removal pass with a dry cloth if needed.
Tip: Do not rush the curing process; premature cleaning can set haze more deeply.
Got Questions?
What size grout trowel should I use for small tile joints?
For small joints, a finer notch is typically better, as it deposits a smaller bead of grout that fills the joint without overfilling. Always test on a scrap tile area to confirm the fill and ease of cleanup.
For small joints, use a finer notch and test on scrap tile to confirm you get a clean fill with minimal cleanup.
Can I use different notch sizes in the same project?
Yes. Areas with different joint widths or tile sizes may benefit from different notches. Test on scrap pieces to ensure consistent fill and finish, then apply the winning notch to the rest.
Yes. Use different notches for areas with different joint widths, after testing on scrap pieces.
Does epoxy grout require a different notch than cement grout?
Epoxy grout can behave differently than cement grout. Always follow the epoxy manufacturer's guidance and test a patch to ensure a complete fill and manageable cleanup.
Epoxy grout may need a different notch; follow the manufacturer’s guidance and test first.
Should I reuse the same notch size for patch repairs?
For patches, choose a notch that matches the surrounding joints and reuse the same test approach to ensure consistency. If the joint widths vary, adjust accordingly and test a small area.
Patch areas with the same notch as the surrounding joints and test first.
How can I tell if joints are under-filled after grouting?
Look for visible gaps in the joints and a lack of grout depth. If you see gaps, re-apply grout with the same notch and press it firmly to fill.
Look for gaps or shallow joints and reapply grout with the same notch.
Watch Video
The Essentials
- Match notch size to joint width and tile layout.
- Test on scraps before full application.
- Clean as you go to minimize haze and rework.
- Follow curing times and product guidelines for best results.