Regrout Patio: Restore Outdoor Grout for Durability
Learn how to regrout a patio with a clear, step-by-step guide. Essential tools, materials, and pro tips to refresh outdoor grout and protect against moisture and staining.

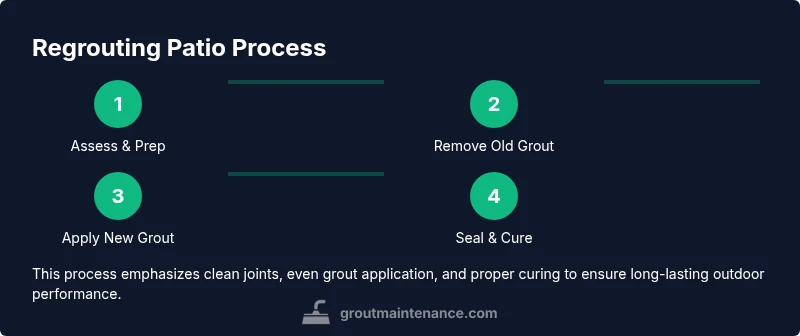
You will learn how to regrout a patio surface to refresh color, seal cracks, and prevent water intrusion. This guide covers essential materials, safety steps, and a clear step-by-step process you can follow in a weekend. You’ll also know when to call a pro and how to maintain the refreshed grout.
Why regrouting patio matters
According to Grout Maintenance, regrouting a patio restores durability and beauty by sealing joints against moisture. Outdoor grout is constantly exposed to sun, rain, and freeze-thaw cycles, which cause cracks and color loss. When grout wears away, water can seep behind the tiles, leading to efflorescence, moss, and loose pavers. Regrouting renews both the appearance and the function by replacing degraded material with fresh cementitious or epoxy grout, improving cleaning and making future maintenance easier. In this article, you’ll learn how to assess your patio, choose the right grout, and perform a clean, durable regrout that lasts for years. We’ll also discuss sealing and routine upkeep so your outdoor space stays inviting.
Assessing your patio for regrouting
Before you pick colors or remove old material, inspect the grout lines thoroughly. Hairline cracks, missing chunks, or loose tiles signal that regrouting is needed. Look for efflorescence or darkened grout, which can indicate moisture behind the joints. If you notice persistent moisture or mold growth, address substrate issues first. Grout Maintenance recommends assessing both the grout condition and the substrate, because durable regrouting starts with solid prep and clean joints that accept new grout.
Choosing grout type and colors for patios
Outdoor patios benefit from grout designed for exposure. Sanded cementitious grout is the common choice for wider joints, while unsanded grout works well for narrow gaps. Epoxy grout delivers superior stain resistance and durability but can be harder to work with and more expensive. When selecting color, aim for a shade that hides dirt yet complements the tile. Sealers are typically recommended after curing to help protect against moisture and staining. Grout Maintenance advises testing color on a small area first to ensure you’re happy with the final look.
Tools, materials, and prep
Having the right tools makes the project faster and cleaner. Prepare a work area with drop cloths or plastic sheeting to protect plants and adjacent surfaces. Clean the joints to remove loose grout and debris, then tape or cover nearby tiles if possible to minimize grout haze. For outdoor jobs, plan for adequate ventilation to avoid fumes when epoxy grout is used, and choose a dry, mild day to allow proper cure.
Step-by-step care and maintenance after regrouting
After the grout has cured, clean the joints gently to remove any haze, then apply a penetrating sealer if recommended for your grout type. Regular maintenance includes sweeping away debris and rinsing with clean water to prevent mold buildup. Periodic resealing may be needed in outdoor environments with heavy weather exposure. Grout Maintenance notes that proper sealing after regrouting significantly improves long-term performance and reduces cleaning effort.
Common mistakes and how to avoid them
Rushing the removal or neglecting joint prep leads to weak bonding and early cracking. Over-watering during mixing can dilute grout, causing color inconsistency and poor strength. Skipping sealing shortens the lifespan. Take your time with removal, clean joints thoroughly, and follow manufacturer curing times closely for best results. The Grout Maintenance team emphasizes patience and precision for durable outdoor regrouting.
Tools & Materials
- Grout removal tool or oscillating multi-tool with grout blade(Used to remove old grout without chipping tiles)
- Rubber grout float(For pressing grout into joints and smoothing lines)
- Margin trowel or putty knife(For mixing and applying grout in tight areas)
- Mixing bucket (1-2 gallon)(For preparing grout mix; use clean water and follow manufacturer ratios)
- Sponge and clean water(For initial cleaning and haze removal after finishing)
- Sealer and applicator(Only if your grout type requires sealing after cure)
- Protective gloves and eye protection(Safety first; prevents skin and eye irritation)
- Moisture meter or moisture indicator test kit(Optional but helpful to confirm substrate dryness)
Steps
Estimated time: 2-6 hours for prep and removal, plus curing time as directed by grout type
- 1
Assess and prep the area
Clear the workspace, cover nearby surfaces, and inspect grout lines for cracks or gaps. Wear protective gear and set up a clean, ventilated area. Remove loose debris from joints to improve adhesion.
Tip: Work in a small zone at a time to maintain control and avoid debris spreading. - 2
Remove old grout
Carefully cut and remove degraded grout along the joints without scratching tile edges. Use a grout removal tool to reach tight corners. Clean dust away after removal and check for any tile movement.
Tip: Keep the tool perpendicular to tile to minimize edge damage. - 3
Clean and dry joints
Wipe joints with a damp sponge and allow joints to dry completely before applying new grout. Ensure there is no moisture behind the tiles, which can weaken the bond.
Tip: If you see moisture, delay grouting and address substrate issues first. - 4
Mix and apply new grout
Prepare grout according to manufacturer directions, then press it firmly into joints with a rubber float. Work in small sections to ensure even color and fill. Remove excess grout after initial set.
Tip: Test a small color patch first to confirm shade and consistency. - 5
Seal and cure
Allow grout to cure as recommended before sealing. Apply penetrating sealer if advised for your grout type, then keep the area dry during the curing window.
Tip: Avoid weather exposure during cure; plan for a dry day and follow curing times.
Got Questions?
Can I regrout patio grout myself or should I hire a pro?
DIY regrouting is feasible for small areas if you have the right tools and time. For large patios, extensive damage, or uncertain substrate conditions, hiring a pro can prevent costly mistakes.
DIY works for small areas, but big jobs or uncertain substrates are better left to a professional.
What grout type is best for outdoor patios?
Sanded cementitious grout is common for wider joints outdoors; epoxy grout offers superior durability but is pricier and harder to work with.
Sanded cementitious grout is typical for outdoor joints, epoxy is tougher but more challenging.
Do I need to seal outdoor grout after regrouting?
Sealing helps protect against moisture and staining. Wait for the grout to cure according to manufacturer guidelines before sealing.
Yes, sealing after curing can extend the life of outdoor grout.
How long should I wait before using the patio after regrouting?
Cure times depend on grout type and weather. Plan for a dry period and follow the product’s specific cure instructions.
Let the grout cure fully according to the product directions before use.
What signs indicate I should regrout now?
Cracked or crumbling grout, loose tiles, visible mold, and water seepage are clear indicators that regrouting is needed.
If grout is cracking, crumbly, or letting water through, regrouting is a good idea.
Is epoxy grout suitable for exterior patios?
Epoxy grout is very durable but more expensive and harder to work with. It’s best in high-traffic or wet outdoor areas if you’re comfortable with the technique.
Epoxy grout lasts long but can be tricky to apply outdoors.
Watch Video
The Essentials
- Choose outdoor-ready grout for durability.
- Prepare joints thoroughly for a strong bond.
- Seal after curing to maximize longevity.
- Maintenance reduces long-term cleaning effort.