Grout Sealer Comparison: How to Choose the Right Sealant for Tile Grout
A comprehensive grout sealer comparison for homeowners and DIYers. Learn about penetrating vs film-forming sealers, durability, application steps, costs, and maintenance to choose the right grout sealer for kitchens, baths, and floors.

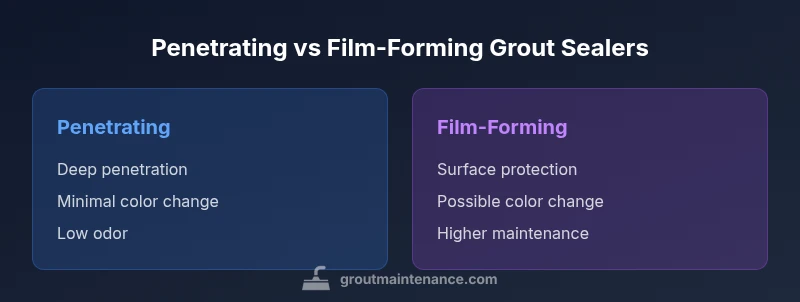
In this grout sealer comparison, the core choice is between penetrating and film-forming sealers. Penetrating sealers soak into grout for stain resistance with minimal color change, while film-forming sealers create a surface barrier that can darken grout and require regular maintenance. For most DIY projects, a high-quality water-based penetrating sealer offers a balanced blend of protection, ease of use, and low odor.
The Core Differentiators in a Grout Sealer Comparison
Choosing the right grout sealer starts by understanding what a sealer does for grout and tile. In this grout sealer comparison, the Grout Maintenance team emphasizes three core dimensions: penetration depth, film formation, and the solvent carrier. Penetrating sealers draw into grout pores, delivering stain resistance with little or no visible color change and preserving the natural look of grout. Film-forming sealers lay down a protective layer on the surface, which can enhance water resistance and gloss but may slightly alter grout color over time and often require periodic reapplication. The choice between water-based and solvent-based systems also matters for indoor air quality, odor, cure times, and cleanup. Water-based products typically release less odor and wash up easily, making them friendlier for DIY kitchens and baths. Solvent-based options can offer deeper hydrophobic protection and longer durability in high-traffic areas. For a practical grout sealer comparison, assess your priorities: durability versus aesthetic changes, application ease, environmental considerations, and how much maintenance you’re willing to perform. According to Grout Maintenance, the right choice balances protection with practicality for your specific tile installation.
Types of Grout Sealers and How They Work
Grout sealers fall into two broad families: penetrating sealers and film-forming sealers. Penetrating sealers (often silicone or siloxane-based) seep into cementitious grout and block staining agents before they reach the surface. They are valued for minimal change to grout color, low odor, and longer-term protection when properly applied. Film-forming sealers (such as acrylic or polyurethane variants) create a coating on top of the grout. They can enhance water resistance and may darken or brighten grout for a uniform appearance, but require careful coating to avoid peeling and may demand more maintenance over time. Some products blend both approaches, delivering partial surface protection with strong penetration. When choosing between these options, consider your grout type (sanded vs unsanded), tile color, room use (shower vs laundry), and how aggressively you want the grout to bead water. For most DIY projects, a water-based penetrating sealer yields the best balance of protection, odor control, and ease of maintenance.
Durability and Longevity: What to Expect
Durability is a central concern in grout sealer comparison. Penetrating sealers generally offer durable protection against staining and moisture ingress when the grout is properly prepped and sealed. Their performance hinges on the grout’s porosity, the presence of contaminants, and how often the surface is cleaned with compatible cleaners. Film-forming sealers can deliver excellent short-term water resistance and may enhance the grout’s appearance, but their durability depends on surface wear, cleaning frequencies, and whether the seal is maintained with reapplication when the coating shows signs of wear. In high-traffic bathrooms or kitchens, expect more frequent refresh cycles with surface sealers, while penetrating sealers tend to hold up longer under normal household use. Remember that environment, cleaning agents, and routine maintenance play significant roles in how long any sealer performs as intended. The Grout Maintenance team notes that real-world results can vary based on substrate porosity and cleaning practices.
Application Techniques for Best Results
Sealing grout correctly begins with thorough surface preparation and precise application. Start by cleaning the grout to remove embedded dirt, mold, and soap scum, then allow it to dry completely. Use a high-quality applicator such as a brush or sponge to apply the sealer evenly along all grout lines, taking care not to flood tiles or pooling liquid. For penetrating sealers, a light, even coat is often enough, followed by a short curing period and, if required, a second coat in highly porous grout. Film-forming sealers may require a slightly heavier first coat and a second coat after an appropriate drying window to build a uniform film without runs or drips. Maintain good ventilation during and after application. Always follow the product’s label for recoat times, cure periods, and cleaning guidelines to avoid trapping solvent residues or causing streaks. The right technique reduces confusion during a grout sealer comparison and leads to a longer-lasting, more attractive result.
Surface Prep That Sets Your Seal Up for Success
Prep work is critical to maximize seal performance. Begin with a deep grout cleaning to remove soap, oils, and mildew that can interfere with absorption. If any grout is cracked or crumbling, repair or regrout before sealing because a compromised substrate undermines the sealer’s effectiveness. Ensure the area is fully dry; moisture can prevent proper penetration and lead to a cloudy finish or missed areas. Use a pH-neutral cleaner that won’t etch cementitious grout. Remove debris from joints with a soft brush, and consider a brief air-dry period before applying any sealer. By investing in meticulous prep, you set the stage for predictable results in your grout sealer comparison trials and improve the overall durability of the installation.
Color, Gloss, and Aesthetics: How Sealers Alter Grout
Sealants influence grout color and gloss, especially with film-forming products. Penetrating sealers often leave grout looking very close to its natural shade, preserving the original appearance. Some penetrating formulas can slightly deepen or darken grout, but changes are typically subtle. Film-forming sealers can increase gloss and may intensify color, which can be desirable in some designs but undesirable in others. If you want a lighter grout or uniform shade across a tiled area, consider how each sealer might affect color under lighting and cleaning conditions. Grout color variations can become more pronounced if the sealer makes dirt or mineral deposits more visible, so test a small, inconspicuous area first. The goal is a durable, clean look that aligns with your tile and room style.
Maintenance and Cleaning After Sealing
Post-sealing care influences long-term performance. Use pH-neutral or mild cleaners that are compatible with your sealer type, avoiding strong solvents or abrasive scrubbers that can wear down the protective layer. For penetrating sealers, routine cleaning is usually sufficient, with rare need for heavy scrubbing. Film-forming sealers may require periodic maintenance to refresh the surface film; examine grout for signs of dullness or wear and recoat as necessary. Always allow complete curing before exposing the area to cleaners, and ventilate the space during and after application to minimize odor exposure. Proper maintenance extends the life of your grout sealer and helps ensure the grout continues to bead water and resist staining.
Cost Considerations and Value for Homeowners
Understanding cost is essential when making a grout sealer comparison. The price of sealer products varies with brand, formulation, and coverage. In general, penetrating sealers cost less upfront and are simpler to apply, making them appealing for most DIY homeowners seeking a straightforward solution. Film-forming sealers may have a higher upfront cost but offer strong surface protection and a specific aesthetic outcome, which can be valuable in bathrooms or showers with high moisture. Remember that maintenance costs, including frequent reapplication or professional recoating, can influence long-term value. A higher-quality product that requires less frequent maintenance can minimize total cost of ownership over time, especially in household environments with heavy use. When conducting a grout sealer comparison, factor in area size, porosity, cleaning regimen, and desired look to estimate worth and durability.
DIY vs Professional Sealing: Pros and Cons
DIY sealing is attractive for its cost savings and control over the project. However, mistakes in preparation, application, or curing can lead to uneven protection or aesthetic issues. Professional sealing offers expertise in surface prep, coverage optimization, and proper ventilation, which can result in a more uniform seal and longer service life. A professional service also reduces the risk of odorous solvents lingering in living spaces and can provide warranties for the work performed. In a thorough grout sealer comparison, weigh the convenience and learning curve of DIY against the reliability and protection that professionals often deliver. Consider your comfort with tools, the area’s exposure to moisture, and your willingness to manage maintenance over time.
Scenario-Based Recommendations: Showers, Kitchens, and Floors
For showers where constant moisture is present, penetrating sealers are typically favored for their deep protection and lower odor. In kitchens and laundry rooms with regular cleaning, a penetrating water-based sealer is often sufficient, particularly when grout is porous. Floors with dense tile layouts in low-traffic areas might benefit from a film-forming sealer if you desire a specific finish or color uniformity, but keep in mind the added maintenance. Exterior grout and porous stone surfaces may require more robust, chemical-resistant sealers. A practical grout sealer comparison should balance environmental concerns, maintenance capacity, and aesthetic goals for each space. Always test any product on a small area first to verify performance before expanding to a full project.
How to Read Labels: Quick Guide to Sealant Specs
Reading product labels is essential for a successful grout sealer comparison. Look for reference terms such as penetration depth, film-forming capabilities, water repellency rating, VOC content, cure times, recoat windows, and coverage estimates. Check compatibility with your grout type (sanded vs unsanded) and tile surface. Note any instructions regarding surface prep, cleaning products to avoid, and recommended maintenance intervals. Labels also indicate whether the product is water-based or solvent-based, which influences odor, cleanup, and environmental impact. While evaluating different products, create a small matrix to compare key specs side-by-side. This approach helps homeowners avoid surprises after application and ensures the chosen sealer aligns with installation goals and cleaning routines.
Decision Checklist for Your Grout Sealer Comparison
To conclude your grout sealer comparison, use a concise decision checklist. Confirm grout porosity and type, room moisture level, and anticipated wear. Decide whether a penetrating or film-forming sealer better suits your priorities: color fidelity, gloss level, and maintenance tolerance. Verify label recommendations for application conditions, cure times, recoat windows, and compatible cleaners. Consider testing on a spare tile or inconspicuous area to compare color change and beading. Finally, compare total cost of ownership by factoring product price, coverage claims, and expected maintenance over several years. With a structured approach, you’ll choose a grout sealer that meets performance needs and aesthetics while fitting your DIY skill level and budget.
Comparison
| Feature | Penetrating Sealer | Film-Forming Sealer |
|---|---|---|
| Durability & Longevity | Longer-lasting with proper prep | Moderate longevity; easier to refresh |
| Color Change / Aesthetics | Minimal color change | Can darken or alter grout color |
| Application Ease | Typically easier to apply; fewer coats | May require careful coating and multiple coats |
| Odor & Ventilation | Low odor | Stronger odor with solvent-based types |
| Maintenance & Reapplication | Less frequent maintenance | Periodic reapplication needed |
| Best For | High-traffic areas, showers, longevity | Aesthetic control and uniform finish |
Pros
- Low odor and user-friendly for DIY projects
- Minimal impact on grout color for a natural look
- Good deep penetration reduces staining when properly applied
- Water-based formulas clean up easily
- Typically lower upfront cost
What's Bad
- May require more frequent reapplication in high-traffic areas
- Can be less protective on very porous grout without proper prep
- Film-forming sealers can chip or peel if not maintained
Penetrating sealers generally offer the best overall balance for most DIY grout projects.
For kitchens and showers where odor, ease of use, and long-term stain resistance matter, penetrating water-based sealers are typically the best starting point. If you specifically want to adjust grout color or achieve a uniform, glossy surface, film-forming sealers may be appropriate but require closer maintenance.
Got Questions?
What is the difference between penetrating and film-forming grout sealers?
Penetrating sealers soak into grout to block stains with minimal color change, while film-forming sealers create a surface coating that can alter grout color and gloss. Both types avoid moisture intrusion when correctly applied, but their long-term behavior differs based on wear and maintenance.
Penetrating sealers go into the grout and stay mostly invisible, while film-formers sit on top and can change color and shine. Both sealers protect against moisture if used properly.
Do I need to seal grout after installation?
Yes, sealing grout after installation protects against stains and moisture. Preparation and complete curing are essential so the sealer can penetrate or form a consistent film. Always follow the product label for timing.
Usually yes. Seal after grout installs and cures, following the product directions.
Can I seal old grout that is stained?
Sealing old, stained grout is possible with proper cleaning and restoration. Deep cleaning may reveal the grout’s true color and porosity, and sealing afterwards helps resist future staining.
You can seal old grout after cleaning it well; sealing won’t remove deep stains by itself.
Is sealing grout in a shower safe?
Sealing showers is safe when using low-VOC products and ensuring adequate ventilation during application and curing. Choose products labeled for bathrooms and follow safety guidelines.
Yes, with proper ventilation and bathroom-suitable sealers.
How long does grout sealer last?
Durability varies with product type, porosity, and maintenance. Most homeowners judge performance by beading and ease of cleaning, then reapply when water no longer beads reliably.
Durability varies; watch for beading and plan maintenance by appearance and cleaning ease.
Should I seal unsanded or sanded grout?
Both grout types can be sealed, but verify that the sealer is compatible with your grout type. Sanded grout is more porous and may benefit more from penetrating sealers, while unsanded grout can be treated similarly.
Both can be sealed; check the product label for compatibility with your grout type.
The Essentials
- Start with penetrating water-based sealers for everyday grout care
- Choose film-forming only if you need color change or a glossy finish
- Always prep grout thoroughly and follow curing times
- Read label specs for coverage and reapplication intervals