Mold on Grout in Shower: Quick Fix, Prevention, and Maintenance
Learn why mold on grout in the shower forms, how to remove it safely, and proven prevention tips. This guide covers cleaning methods, grout sealing, ventilation strategies, and a maintenance routine to keep bathrooms mildew-free.

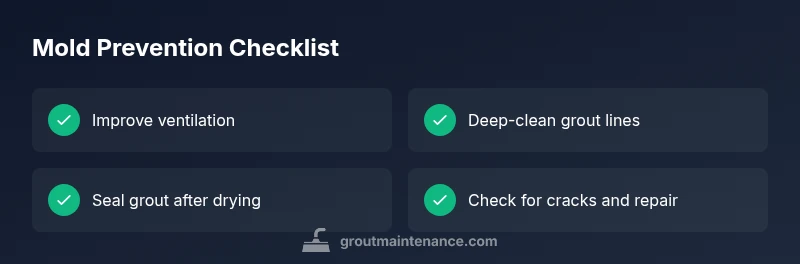
Mold on grout in the shower is typically caused by persistent moisture, poor ventilation, and mineral buildup that feeds mildew. The quickest fix is to scrub the grout with a hydrogen peroxide or oxygen bleach solution, rinse thoroughly, and dry the area completely. For ongoing protection, seal grout after it dries and improve ventilation to reduce humidity.
Why mold forms on shower grout
According to Grout Maintenance, mold on grout in the shower is often driven by persistent moisture and high humidity combined with mineral deposits left from soap and hard water. Poor ventilation traps damp air, letting mildew spores colonize grout lines, especially in corners and behind doors. Grout that’s cracked or damaged also provides spaces for moisture to linger. Over time, these conditions turn tiny spores into visible dark patches. Homeowners who clean only the surface or neglect catch-up maintenance will see mold recur more quickly due to ongoing moisture exposure. Understanding the root causes helps you choose the right fixes and prevent future outbreaks.
Quick fixes you can do right now
If you notice mold on grout in the shower, start with the simplest steps that curb spread and re-growth. Improve airflow during and after showers, wipe surfaces dry with a microfiber cloth, and identify any leaks or drips that keep the area damp. Use gloves and a mask to protect yourself from strong cleaners. For most homes, a thorough wipe-down, targeted scrubbing, and drying will stop the current growth and make room for deeper cleaning. If you still see mildew after these steps, plan a more intensive cleaning and sealing routine. Grout maintenance is an ongoing process, not a one-time job.
Cleaning methods and agents that work
There are several effective approaches for removing mold on grout in the shower. Hydrogen peroxide (3%) or oxygen bleach is a common first choice because it lifts stains without harsh fumes. Let it sit for a few minutes before scrubbing with a stiff brush, then rinse thoroughly and dry. Baking soda paste can help with stubborn residues when used with water. Some cleaners labeled for mold remediation work well, but always test a small area first to avoid discoloration on colored grout. Never mix cleaners with ammonia or bleach; this creates dangerous fumes. Follow product directions and vent the room well.
Sealing grout and restoration options
After deep cleaning and drying, sealing grout slows moisture penetration and inhibits mold return. Penetrating grout sealers work best after the grout has cured from cleaning. For shower environments, consider epoxy grout or epoxy-based sealers for superior stain resistance and moisture tolerance. If grout is cracked or crumbling, re-grouting may be necessary before sealing. Restoration options vary by grout type (sand vs unsanded) and tile layout, so assess whether you should patch, regrout, or replace sections for a long-term solution.
Ventilation, humidity control, and long-term prevention
The ultimate defense against mold is controlling humidity. Run an exhaust fan during showers and for at least 15-20 minutes after, or crack a door/window if possible. Keep a hygrometer in the bathroom to monitor moisture; aim for 40-50% RH on average. Wipe down tiles after use, dry the grout lines, and address leaks promptly. Regular cleaning with appropriate cleaners, combined with periodic sealing, reduces the chance of mold coming back. Consistency matters more than a one-off deep clean.
When mold indicates bigger issues or needs professional help
If mold recurs despite thorough cleaning and sealing, or if you notice musty odors, warped tiles, or suspected leaks behind walls, it may indicate a hidden moisture problem. In those cases, consult a licensed plumber or contractor to inspect for leaks, hidden water damage, or structural concerns. Mold that has penetrated drywall or behind grout may require remediation, mold containment, and remediation services. Acting early prevents escalating costs and health risks.
Establish a maintenance routine to keep mold at bay
Create a monthly cleaning schedule focused on grout lines: quick wipe-down after showers, a deeper clean every 4-6 weeks, and a re-sealing cadence every 12-24 months depending on grout type and bathroom humidity. Keep humidity in check with a fan, open windows when feasible, and replace worn grout as soon as signs of wear appear. A simple routine is often the best defense against mold and mildew.
Steps
Estimated time: 60-90 minutes
- 1
Gather supplies and safety gear
Collect gloves, a mask, splash-proof eye protection, a stiff brush, appropriate cleaners, a damp rag, and a grout sealer. Clear the shower area and remove items from the niche to avoid contamination.
Tip: Wear protective gear; mold particles are easier to manage when you're protected. - 2
Ventilate and prep the area
Turn on the exhaust fan, open a window if possible, and run a small fan to pull moisture away. Wipe down surfaces to reduce standing water before deep cleaning.
Tip: Good airflow makes cleaning more effective and safer. - 3
Apply cleaner and let it work
Apply hydrogen peroxide or sodium percarbonate-based cleaner to grout lines, ensuring full coverage. Let it sit for 5-10 minutes to loosen mildew, then scrub with a stiff-bristle brush.
Tip: Do not mix cleaners; follow label directions for dwell time. - 4
Rinse and repeat if needed
Rinse thoroughly with warm water and inspect for remaining mold. Repeat the cleaning cycle on stubborn spots until grout looks uniform.
Tip: Rinse until water runs clear to prevent residue. - 5
Dry completely and assess grout health
Dry the area with towels or a hair dryer set on cool to remove residual moisture. Check grout for cracks or crumbling that would require repair.
Tip: Moisture-free grout is essential before sealing. - 6
Seal and maintain
Apply a penetrating grout sealer per manufacturer instructions after the grout is completely dry. Re-seal as recommended and keep humidity in check to prevent recurrence.
Tip: Apply in a well-ventilated area and avoid sealing wet grout.
Diagnosis: Visible mold on grout in the shower
Possible Causes
- highPersistent moisture due to poor ventilation or leaks
- mediumInfrequent cleaning and mineral buildup
- lowCracked or damaged grout allowing moisture intrusion
Fixes
- easyIncrease ventilation by using an exhaust fan or opening a window; fix leaks or damaged grout
- easyDeep-clean grout with peroxide/oxygen bleach, rinse, and dry thoroughly; re-apply sealer after full drying
- mediumPatch or re-grout damaged areas and reseal after curing
Got Questions?
Is bleach safe to use for mold on grout in the shower?
Bleach can kill surface mold on non-porous tiles, but it may not reach deeply embedded mold in grout and can discolor colored grout. Hydrogen peroxide or oxygen bleach are often safer and effective for grout cleaning.
Bleach can kill surface mold, but it may discolor grout and won't always reach deeply embedded mold. Safer options are hydrogen peroxide or oxygen bleach.
Can mold grow behind grout in a shower?
Yes. If grout is cracked or damaged, moisture can penetrate behind it, promoting hidden mold growth. In such cases, inspect behind the grout and consider regrouting or professional remediation.
Yes—moisture can get behind damaged grout, leading to hidden mold. You may need to inspect and possibly regrout.
How long does grout sealer take to dry?
Drying times vary by product, but most sealers dry to the touch in 2-4 hours and require a full cure before exposure to water. Follow the manufacturer’s instructions for the best results.
Most grout sealers dry to the touch in 2-4 hours and cure fully after about a day. Check the label for specifics.
What’s the difference between mold and mildew on grout?
Mildew is a superficial, powdery growth on surfaces, while mold can penetrate and discolor materials. Both should be cleaned promptly, but persistent mold may indicate moisture problems behind or within the grout.
Mildew is a surface issue; mold can penetrate surfaces. Both require cleaning, and recurring mold may signal a moisture problem.
When should I replace grout?
If grout is cracked, chipped, crumbling, or mold returns after deep cleaning and sealing, replacement is recommended. A pro can help determine whether regrouting or full replacement is necessary.
Replace grout if it's cracked or mold keeps returning after cleaning and sealing.
Watch Video
The Essentials
- Act quickly when you see mold on grout in the shower.
- Use safe cleaners and thoroughly dry grout before sealing.
- Improve ventilation to prevent re-growth and maintain a maintenance schedule.
- Know when to call a pro for hidden leaks or structural mold