Thin grout lines vs thick: An analytical comparison for tile projects
An analytical side-by-side look at thin grout lines versus thick grout lines, covering aesthetics, maintenance, installation, and real-world scenarios to help homeowners decide the best grout thickness for their tile projects.

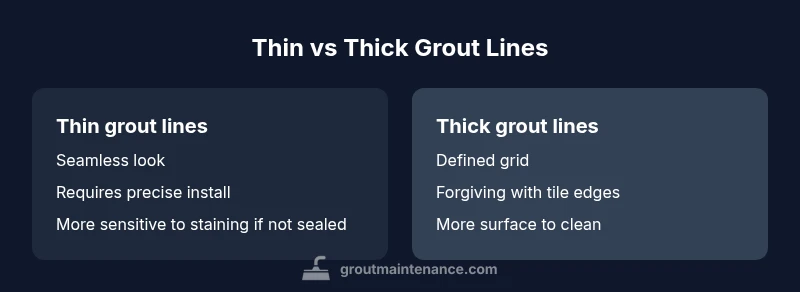
Thin grout lines vs thick grout lines create different looks and upkeep. Thin lines offer a contemporary, seamless appearance but demand precision during installation and careful sealing to prevent staining. Thick lines are forgiving on uneven tiles and hide minor imperfections, yet they collect more dirt and can require more maintenance. In practice, tile size, room style, and cleaning commitment decide the best choice.
Introduction to grout line thickness and its practical impact
Understanding how thin grout line vs thick grout line choices affect tile projects helps homeowners forecast maintenance, aesthetics, and longevity. The decision influences cleaning routines, sealing strategies, and even the way a room feels. According to Grout Maintenance, thickness choices should align with tile size, room function, and maintenance willingness. The Grout Maintenance team found that many projects stumble when the line width is assumed to be purely cosmetic; in reality, it changes how the surface behaves under moisture, how visible the grout is after sealing, and how forgiving the installation must be. In this guide, we examine the practical differences, common scenarios, and the trade-offs you’ll face with either approach. The goal is to give you a clear framework for choosing thin grout lines vs thick that fits your tile layout and lifestyle, rather than relying on fashion alone.
Aesthetic impact: perceived tile size and line definition
The thickness of the grout line dramatically changes how large a tile looks and how bold the grid feels in a space. Thin lines tend to blur the edges, making walls and floors look more seamless and modern. Thick lines create a clear, defined grid that highlights tile edges and can emphasize tile size and texture. For homeowners aiming for a contemporary look, thin grout lines + uniform tile edges can elevate the perception of space and light. Conversely, if tiles show irregularities or beveled edges, a slightly wider joint can soften the overall impression and give a handcrafted feel. Grout color choices become more critical with thin lines, because the contrast between tile and grout is more noticeable; with thick lines, contrast has a gentler visibility.
Maintenance and cleaning implications
Grout maintenance is a major factor in choosing line thickness. Narrow joints offer less grout surface to clean, which can speed up routine cleaning in busy households. However, thin lines are more susceptible to staining and mold if sealing is inadequate or if moisture lingers, especially in damp bathrooms. Wider joints provide more grout material that can be sealed, making it easier to seal and less prone to staining in many cases, but they also present more surface area to scrub over time. The balance between cleaning frequency and product efficacy matters; sealing with a high-quality grout sealer reduces staining risk for both thin and thick lines, but thin lines demand careful, uniform sealing to avoid dark patches. In practice, implement a cleaning schedule that matches your grout width and humidity levels.
Installation precision and tile layout challenges
Installing thin grout lines requires precision in tile placement, consistent spacing, and careful projection of grout width across the entire surface. Any deviation becomes more visible with narrow joints, and small tiling errors can appear exaggerated. In contrast, thicker joints are more forgiving of minor misalignments because the visible grid hides subtle imperfections and some variation in spacing. This is why many DIY projects gravitate toward thicker joints when tile surfaces are uneven or non-standard sizes. The installer’s toolkit—calibrated spacers, level guides, and consistent grout width—plays a larger role when pursuing a thin-line aesthetic, and you should budget for additional time and care in layout verification.
Durability and moisture dynamics
Moisture movement around tiles can influence grout performance, particularly in wet rooms or showers. Thin lines can be more susceptible to cracking from slight substrate shifts because there is less grout bulk to absorb movement. Thicker joints contain more grout, which can distribute movement more evenly, reducing micro-cracks but potentially increasing shrinkage over time if the grout dries too much. The sealant's role is critical for both thicknesses; a properly cured seal extends the life of the grout and helps keep moisture from seeping behind tiles. In humid environments, consider epoxy or hybrid grout types for improved durability and stain resistance when you expect heavy moisture exposure.
Color matching, finish, and edge visibility
Color choice interacts strongly with line thickness. With thin lines, the grout color becomes part of the wall’s overall look; even slight color variances between batches can stand out. For this reason, designers often choose grout colors that closely resemble the tile edge or use tinted sealants to stabilize appearance. In thicker lines, color inconsistencies are less visible because the line itself acts as a boundary. Finish also matters: polished tiles reflect light differently, so the grout's matte or satiny finish can either blend or emphasize the joints depending on thickness. If you plan a dramatic color or a high-contrast look, narrow joints require extra consistency in material batches.
Tile formats and recommended thickness choices
Large-format tiles and uniform edge profiles typically complement thin grout lines because gaps can be controlled and consistent across large surfaces. Mosaic and subway tiles with flat edges can achieve a crisp look when the joints are carefully planned. Irregular or natural stone tiles, on the other hand, often benefit from thicker joints that hide minor miscuts and edge irregularities. Always consult tile manufacturer guidance and perform a mock layout to determine the most forgiving joint width for your tile system. In practice, the tile edge quality and manufacturing tolerance largely decide whether thin lines will look precise or stressed on a given installation.
Cost, time, and labor considerations
Choosing thin grout lines can increase labor costs due to the need for exacting placement, precision spacing, and potentially higher-grade grout and sealants. This can lengthen project time, especially for DIY installers without professional tools. Thick grout lines generally reduce installation complexity and may lower upfront costs, but long-term maintenance costs can rise if cleaning requires frequent sealing or stain treatment. The decision should weigh the project scope, tile format, and the homeowner’s willingness to invest in proper sealing and maintenance. Consider whether you want a faster DIY process or a longer-term, lower-maintenance plan that prioritizes durability.
Practical scenarios: when thin lines shine
Thin grout lines pair well with modern glass mosaic patterns, large-format porcelain tiles, and minimalist kitchens and bathrooms where a seamless field is desired. In these scenarios, the grout line becomes part of the design language, not a focal point. A consistent line width across wet and dry areas helps maintain uniformity. Ensure that tiles are well manufactured with precise edges, and use non-sanded or micro-sanded grout that matches the tile surface for best results. The outcome should feel expansive and calm rather than busy, which aligns with contemporary design trends that favor simplicity and clarity.
Practical scenarios: when thick lines shine
Thick grout lines are often preferred for rustic, handmade, or natural stone tile installations where edges are not perfectly uniform. They hide edge discrepancies and minor lippage, making the overall surface look intentional rather than chipped. They also provide a robust, tactile feel and can be easier to seal given slightly broader joints. For high-traffic areas or kitchens where cleaning frequency is a concern, slightly thicker joints can be advantageous since the grout perimeter is more forgiving to wear and scruff marks. In addition, thicker lines can create a deliberate texture that adds character to a space.
Tools, products, and best practices
Invest in quality tools if you pursue thin grout lines: calibrated spacers, level guides, and consistent trowel thickness help maintain even gaps. Choose grout types appropriate for your joint width: unsanded for very narrow lines and traditional sanded grout for standard widths; epoxy-based grouts offer superior stain resistance at a premium cost. In both cases, color-matching and sealing are crucial; apply a compatible sealer after curing to minimize staining. For thick lines, standard grouts with good sealing still apply, but cleaning and maintenance routines may be less visually critical between sealings. Always follow manufacturer instructions to avoid shrinking or cracking from improper mixing.
Maintenance planning: a step-by-step approach
Create a yearly maintenance plan that accounts for tile type, grout color, and room humidity. Start with a thorough cleaning using a grout-safe cleaner that won’t degrade the sealant. Schedule resealing when the surface shows signs of wear or after a deep clean, and consider an occasional grout refresh if color fade appears. Maintain consistent humidity and prevent water pooling on floors to preserve grout integrity. Such a plan helps prolong the life of either thin or thick grout lines and keeps tiles looking fresh. Track wear and sealant performance and adapt your plan to changes in usage or weather patterns.
Final decision checklist and next steps
Use a practical checklist to decide between thin vs thick grout lines: evaluate tile format, room use, and maintenance capacity; assess decision in terms of aesthetics, cost, and durability; verify installation capability if you intend a thin-line approach; and plan for a sealing regimen to protect your grout. Before finalizing, run a small mock layout and consult with a tile professional to confirm that your chosen line width aligns with tile tolerances and grout recommendations. The right choice blends design goals with realistic maintenance expectations and a plan for ongoing care.
Comparison
| Feature | Thin grout lines | Thick grout lines |
|---|---|---|
| Aesthetics | Modern, seamless appearance | Defined grid with visible tile edges |
| Tile compatibility | Best with precise edges and uniform tiles | Forgiving with irregular tiles or mixed sizes |
| Installation difficulty | High precision required | Easier and more forgiving |
| Cleaning and maintenance | Less surface area but staining risk if not sealed | More surface area but easier to seal and maintain |
| Repair/regrouting | Harder to repair; may require professional rework | Easier to reseal or replace in sections |
| Cost and time | Higher upfront cost and longer install | Lower upfront cost; maintenance varies by usage |
| Durability and moisture | Can crack with movement; dependent on sealant | Tolerates movement but color wear may be more visible |
Pros
- Creates a contemporary, seamless look that enlarges tile appearance
- Less grout area reduces surface to clean in some layouts
- Hides minor edge imperfections with careful planning
What's Bad
- Requires precise tile spacing and skilled grouting
- Prone to visible staining if sealing is incomplete
- Repairing ultra-narrow joints is technically challenging
Thin grout lines are preferred for a contemporary look when precision is achievable; thick grout lines offer practicality and ease for imperfect tile surfaces.
Choose thin lines if your tile edges are uniform, you value a seamless appearance, and you can invest in meticulous installation and sealing. If your tiles vary in size or edge quality, and you want a more forgiving project with simpler maintenance, thicker joints are often the better choice. Always plan for proper sealing and a maintenance routine aligned with your grout width.
Got Questions?
Are thin grout lines suitable for showers?
Thin grout lines can work in showers, but they require high-quality sealing and precise installation to prevent staining and mold. Regular sealing and good moisture management are essential in wet areas.
Thin grout lines can work in showers, but you’ll want top-quality sealing and professional installation to prevent mold and staining.
What tile sizes work best with thin grout lines?
Thin grout lines pair well with large-format and uniformly cut tiles, where spacing can be kept consistent. They are less forgiving with irregular tiles, so mock layouts and edge quality matter.
They work best with large-format or uniformly cut tiles; mock layouts help ensure a precise gap.
Can I convert existing thick grout lines to thin without retiling?
In most cases, you’ll need to remove old grout and re-tile to achieve truly thin joints. Regrouting alone rarely results in a markedly thinner joint if tile edges are not uniform.
Often you need to re-tile to get truly thin joints; regrouting alone won’t suffice.
What grout types are recommended for thin lines?
Unsanded or micro-sanded grout is typically used for very narrow joints to minimize texture; color matching is important to minimize contrast with the tile. Epoxy grout offers stain resistance but comes at a premium.
Unsanded or micro-sanded grout works best for thin lines; match color carefully and consider epoxy for stain resistance.
How long does regrouting take and what maintenance is required?
Regrouting duration varies by area and tile type, but expect some downtime during work and curing. After regrouting, seal the joints to minimize staining and protect against moisture buildup.
Regrouting can take a bit; sealing afterward helps prevent staining and moisture issues.
The Essentials
- Assess tile format and room use before choosing grout thickness
- Thin lines demand precise installation and sealing
- Thicker lines offer forgiveness for imperfect tiles but require regular cleaning
- Color choice is more critical with thin lines