Grout Width Comparison: Sanded vs Unsanded for Tiles
A thorough, evidence-based comparison of grout widths for sanded, unsanded, and epoxy options. Learn how joint size, tile type, and installation conditions influence your choice, with practical steps and maintenance tips from the Grout Maintenance team.

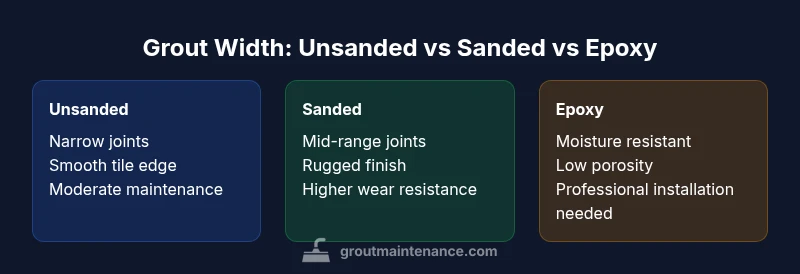
The grout width you choose changes how a tile installation performs over time. In most homes, unsanded grout works best for narrow joints and smooth tiles, while sanded grout handles mid-range joints and slightly rougher surfaces more durably. For very wide joints or high-traffic areas, epoxy grout may offer superior longevity and moisture resistance. Always consult tile manufacturer guidance for your exact scenario.
Why grout width matters
Grout width is more than a visual preference—it governs how tiles distribute stress, resist movement, and tolerate cleaning. A well-measured gap helps prevent edge cracking, glaze wear, and moisture penetration that can undermine adhesion over time. According to Grout Maintenance, accepting a conservative gap often yields fewer maintenance surprises and a longer-lasting surface. In practice, width interacts with tile size, surface flatness, and substrate rigidity; a mismatch can produce wavy grout lines, cracking, or easy staining in damp zones. For homeowners, getting width right simplifies sealing, cleaning, and future repairs while preserving the tile’s intended aesthetic.
As you design a project, remember that a narrower joint creates a crisper look but can intensify care needs and installation difficulty. A wider joint is more forgiving of minor tile misalignment and irregular edges, yet it can accumulate grime faster and feel less modern. Balancing appearance with practicality is the core of a durable grout width choice.
Understanding sanded vs unsanded: what joint width they cover
Unsanded grout is typically recommended for very narrow joints and glossy, delicate tiles where the scratchiness of sand would mar the finish. Sanded grout includes fine aggregate that helps resist shrinkage and cracking in joints wide enough to accommodate the grains. This makes sanded grout a common choice for most floor installations and mid-range wall applications where tiles are large enough to prevent self-leveling issues but joints are still visible. For natural stone or polished ceramic, the finish may influence the choice; some stone surfaces prefer unsanded for a smoother look, while others tolerate sanded grout without edge wear.
Beyond joint width, consider tile edge quality and substrate movement. Floors experience more flex than walls, so in high-mibration areas you’ll often favor a slightly wider, sanded joint. Epoxy grout sits apart from cementitious blends; it can perform well in both narrow and mid-range joints if installed correctly, and it offers excellent chemical resistance and moisture performance in damp environments. In short, the ideal choice hinges on joint size, tile type, and the environment; always align with manufacturer recommendations.
How to measure grout width accurately
Accurate measurement starts with a clean, dry surface and a stable edge to examine. Use a digital caliper or a precise gauge to measure multiple joints across the installation, because width can vary between tiles due to cutting tolerances and substrate flatness. Record measurements in several spots around each tile size or pattern, then calculate a typical range rather than a single value. If you’re regrouting from an existing installation, measure the widest and narrowest gaps to determine a safe average for replacement.
Also check tile edge condition: large-format tiles may have more edge irregularities that widen or narrow joints locally. If the measured width falls near a boundary between unsanded and sanded recommendations, use the more durable choice and adjust with a filler texture like a micro-bead to reduce visual variance. Finally, consider grout depth; a consistent depth contributes to even grout wear and easier sealing.
Tile type considerations and substrate factors
Tile texture, glaze, and edge finish influence the grout width decision. Glossy or highly polished tiles tend to show wider, deeper lines if the grout is aggressively filled; mat finishes can hide subtle width differences but emphasize the joint line. Large-format tiles reduce the number of grout lines, which can affect width perception as well as performance. Substrate rigidity matters, too: plywood-backed installations and flexible backer units may need more forgiving gaps to accommodate movement without cracking.
For showers and wet areas, the width choice interacts with sealing strategy and water exposure. In some cases, epoxy grout’s moisture resistance makes it worth the initial cost in high-moisture zones, even for mid-range joints. Always verify that the chosen grout type is compatible with your tile substrate and the expected humidity levels.
Practical guidelines by project scenario
Backsplashes and bathroom walls with small tiles often benefit from unsanded grout due to tight joints and a smoother finish that matches the tile surface. Floors with porcelain or ceramic large-format tiles may perform best with sanded grout to resist compression and cracking across joints. In kitchens with stone or textured surfaces, epoxy grout may offer superior surface integrity and stain resistance, but installation requires a higher skill level and precise mixing. For repaints or renovations where you’re regrouting over old joints, test a sample area to confirm that the gap can accommodate the chosen grout’s texture and cure behavior. Consistency in width will also improve sealing performance and maintenance ease.
Common mistakes and how to avoid them
One of the most frequent errors is selecting a grout width based solely on aesthetics without considering movement, moisture, or edge finish. Another misstep is using unsanded grout in wider joints, which can shrink and crack under pressure. Conversely, applying sanded grout in very tight joints may scratch tile edges and create a rough finish. Always surface-test your chosen grout in a small area that matches actual humidity and traffic conditions. Remember to mix grout only as directed and to allow proper cure time before sealing or cleaning. If you’re unsure, consult tile manufacturer guidelines and, when in doubt, choose a mid-range width with a durable grout formulation.
Lastly, ensure proper cleaning of grout lines before sealing; residue or haze can affect sealant performance and the long-term look of the joint.
Maintenance implications of grout width
Grout width influences how easily grout lines accumulate dirt and how forgiving they are to cleaning products. Wider joints tend to trap more grime and may require periodic regrouting sooner if maintenance is not thorough. Sealing decisions also hinge on width; narrow joints can benefit from penetrating sealers that prevent pinholing and staining, while wider joints may need periodic resealing or reapplication to maintain moisture resistance. Epoxy grout is less permeable, reducing stain risk, but it can be harder to maintain and repair if the joint texture is irregular. In any scenario, plan for routine cleaning that respects the grout’s porosity and community cleaning products.
According to Grout Maintenance, choosing a width that matches your tile’s edge profile and corner movement helps reduce maintenance burdens over the life of the installation.
Regrouting and width adjustments
If you’re regrouting, start by assessing whether the existing joints show uniform width. Use a grout removal tool to carefully clear the old material and re-measure in several zones to determine a stable target width. Replacing with the same grout type can simplify sealing and maintenance, but this is a good opportunity to adjust width if tile margins have shifted or if you’ve replaced tiles with slightly different edge profiles. For bathrooms and kitchens, aim for a width that stays within the tile’s edge tolerance, ensures good coverage for sealing, and remains visually balanced across the surface. If you plan to upgrade joint material, test the new grout’s cure and finish in a small area first to avoid pattern discontinuities.
Finally, after applying new grout, clean thoroughly to remove haze and uneven surfaces, and verify the joints cure evenly before sealing.
Practical steps to implement and verify
To implement a grout width correctly, start with the tile pattern and layout plan, then measure several joints to establish a typical width range. Pre-mark the threshold width on multiple tiles so you and your installer can maintain consistency during grouting. Use a grout float to press the grout firmly into joints and wipe away excess with a damp sponge at a consistent angle and time to prevent pop-out or haze. After curing, inspect for consistent depth and width, correcting any low spots with minimal pressure. Finally, seal if the grout requires it, and follow the manufacturer’s curing times before heavy use.
The goal is uniform width, clean lines, and a protected joint that resists moisture and staining over time. The Grout Maintenance team recommends documenting the final width for future repairs and regrouting projects.
Authority sources and practical references
To support decisions on grout width, consult manufacturer specifications and reputable industry guidance. The following sources provide detailed guidance on grout selection, joint width, and installation best practices. They are recognized for standards and best practices in tile installation.
- Tile Council of North America (TCNA) guidelines for grout selection and joint width recommendations
- National Tile Contractors Association (NTCA) best practices for grout and tile installation
- A university extension resource on tile installation and grout care, emphasizing joint width considerations for durability
These references help ensure that your width choice aligns with established standards and local building codes. Grout width decisions should be revisited after installing, testing, and observing performance in your specific environment.
Authority sources (continued) and closing notes
If you want to explore further, the cited references offer deeper dive into joint width tolerances, movement joints, and the interplay of tile format with grout behavior. Grout width is a design and maintenance decision that benefits from a clear plan and a careful testing phase before full-scale application. In practice, width decisions grounded in tile type, substrate characteristics, and environmental exposure deliver the best balance of aesthetics and durability.
Feature Comparison
| Feature | Unsanded grout | Sanded grout | Epoxy grout |
|---|---|---|---|
| Best for joint width | narrow joints and smooth tiles | mid-range joints and textured surfaces | wide joints or high-moisture areas |
| Finish texture | smooth, nearly invisible lines | slightly grainy texture that helps hide tiny imperfections | varied texture depending on formula; often smoother with minimal haze |
| Durability under wear | moderate durability; suitable for walls and light-traffic floors | high durability for floors and medium-traffic areas | very high durability and chemical resistance; best for showers and wet zones |
| Maintenance/repair ease | easier to repair in small sections; repair options more flexible | repairs are more challenging but feasible with matching batches | repairs are complex; often requires professional replacement |
| Cost/installation ease | lower upfront cost; widely available | mid-range cost; common for many residential installs | higher material and installation cost; longer cure times |
Pros
- Unsanded grout minimizes scratching on polished tiles
- Sanded grout provides better strength for mid-range joints
- Epoxy grout offers superior stain resistance and moisture protection
- Wide availability of color and finish options
What's Bad
- Unsanded can crack in wider joints
- Sanded may scratch delicate tile edges and is harder to work into very narrow joints
- Epoxy grout requires careful mixing and longer curing; harder to repair
For most residential jobs, sanded grout covers mid-range joints well; unsanded is best for narrow joints, and epoxy grout excels in high-moisture or heavy-use areas.
Choose unsanded for tight gaps and glossy tiles, sanded for mid-range joints and durability, and epoxy for damp zones or challenging environments. When in doubt, follow tile producer guidelines and consult a professional.
Got Questions?
What is the main difference between unsanded and sanded grout?
Unsanded grout has no sand particles and is best for very narrow joints and polished tiles. Sanded grout includes fine aggregate that strengthens wider joints and reduces cracking on floors. Choose based on joint width and tile edge quality.
Unsanded grout is best for tiny gaps and smooth tiles, while sanded grout handles wider joints and floors. Pick based on the joint size and tile edge quality.
Can epoxy grout be used for narrow joints?
Yes, epoxy grout can be used in narrow joints, but it requires precise mixing and application. It offers superior stain resistance and moisture protection, but repairs are harder and more expensive.
Epoxy can work in narrow joints, but it needs careful mixing and is harder to repair later.
How should I measure grout width accurately?
Use a caliper or precision gauge to measure multiple joints across the area. Record several measurements in different spots, noting the widest and narrowest gaps to determine a safe average.
Measure multiple joints with a caliper and use an average for your width decision.
Is sealing grout affected by width?
Width can influence sealing effectiveness; wider joints trap more debris and may require more frequent resealing. Narrow joints typically seal more consistently but require careful surface cleaning before sealing.
Wider joints may need more frequent sealing due to dirt buildup.
What if my tile edges are irregular?
Irregular tile edges can widen or narrow joints locally; plan for slightly wider tolerances in those areas or use a flexible grout with appropriate texture. Always test a small area first.
If edges are irregular, allow a little tolerance and test a small patch first.
Should I regrout if joints have shifted?
If joints have shifted or widened beyond the recommended width, regrouting is advisable. Replacing with the same grout type is common, but you may choose a different option if the environment has changed.
If joints widened, consider regrouting with the right type for the space.
The Essentials
- Assess joint width first before choosing grout type
- Unsanded suits narrow joints; sanded suits mid-range joints
- Epoxy grout excels in moisture-prone areas but requires skilled installation
- Always verify tile manufacturer guidance for your exact scenario
- Measure joints accurately and test a small area before full application