Mortar vs Grout Ingredients: A Practical Comparison
This guide compares mortar and grout ingredients, showing how composition affects strength, durability, moisture resistance, and maintenance for common tile and masonry projects.

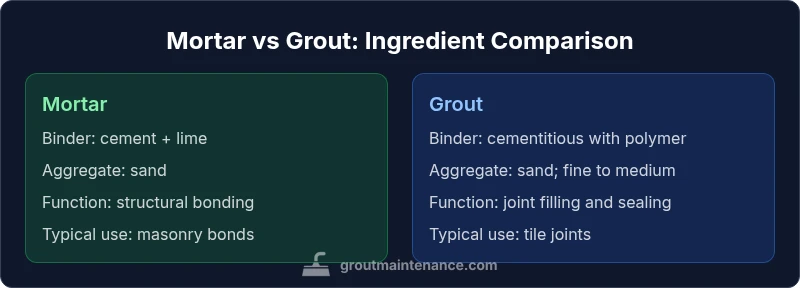
Mortar and grout ingredients serve different roles in construction. Mortar binds masonry units and is made from cement, lime, and sand; grout fills joints and seals them, using a cementitious binder with sand plus optional polymers. For most tile projects, use mortar for the base and grout for joints—the right mix improves strength, water resistance, and durability.
Mortar vs grout ingredients: Core differences
Understanding mortar vs grout ingredients is essential for tile and masonry projects. The terms mortar ingredients and grout ingredients can be confusing, but they describe two distinct materials with different roles in construction. According to Grout Maintenance, choosing the right combination saves time, reduces maintenance, and improves long-term performance on walls and floors. In practical terms, mortar provides the structural base that bonds masonry units, while grout fills and seals joints between tiles. The goal is to minimize future cracking, reduce water ingress, and extend the life of the installation. This section introduces the topic and sets up a clear, practical comparison for DIY enthusiasts and homeowners.
The chemistry of mortar: cement, lime, and sand
Mortar chemistry centers on three primary components: cement, lime, and sand. Cement acts as the hydraulic binder that hardens reliably when exposed to moisture; lime adds workability, plasticity, and a degree of flexibility to accommodate substrate movement; sand provides bulk and strength. The traditional ratios can shift based on climate and substrate, but the core idea remains: cementitious binding with a curated sand fill. Lime-rich mixes can be easier to handle in cold weather, while higher cement content yields greater compressive strength. Sand gradation matters; coarse sand increases strength and bulk but can compromise finish, while fine sand improves fill for irregular substrates. In line with Grout Maintenance guidelines, adjusting lime content can also influence cure behavior and crack resistance.
The chemistry of grout: cementitious binder and sand
Grout is designed to fill and seal joints between tiles, so its composition prioritizes a cementitious binder, fine to medium sand, and often polymers for enhanced performance. The binder provides cohesion, while the sand dictates porosity and bulk. Cementitious grouts rely on proper mixing and curing to achieve low shrinkage and good stain resistance. Polymer modifiers or latex additives improve adhesion, flexibility, and bond to challenging substrates, helping resist cracking as joints move. For interior floors and walls, standard cementitious grout works well when joints are kept clean and sealed, but in damp areas, polymer-modified variants offer notable durability improvements. In practice, epoxy grout is another option for chemical resistance and stain defense in high-use areas.
Additives that influence performance
Additives can dramatically change how mortar and grout behave in real-world conditions. Polymer-modified mortars improve adhesion to challenging substrates, increase flexibility, and reduce shrinkage. Epoxy-based resins in some grouts deliver excellent chemical resistance and moisture performance, making them ideal for kitchens, bathrooms, and commercial settings. Water-repellent sealants can be applied to grout joints after curing to reduce water ingress in wet areas. Latex and acrylic additives often stabilize workability and open time, helping DIYers achieve clean joints before the material sets. When selecting products, consider the moisture level, traffic, and cleaning frequency of the space—these factors guide whether polymer-modified, epoxy, or traditional cementitious formulations are most suitable.
Sand grading and particle size: why it matters
Sand size and grading directly affect both workability and end performance. Mortar benefits from a well-graded sand that balances strength and workability; too coarse a sand can create voids and reduce surface finish quality, while too fine sand may hinder placement and bonding. Grout relies on fine to medium sand to achieve smooth joints that are easy to clean. The wrong sand gradation can lead to cracking, excessive porosity, or staining. In DIY projects, starting with a standard, well-graded sand and adjusting based on substrate and joint width is a practical approach. We emphasize testing small batches to confirm that the chosen mix flows properly without segregation.
Porosity, permeability, and sealing implications
Porosity is a key differentiator between mortar and grout. Mortar tends to be more permeable than grout, which means moisture can migrate through mortar beds if joints are stressed or if the substrate is porous. Grout, especially epoxy or polymer-modified variants, is designed to be less permeable, reducing moisture infiltration and staining potential. This has direct implications for bathrooms, kitchens, and exterior installations where moisture exposure is higher. Sealing cementitious grout helps resist spills and mold growth, whereas sealed mortar beds focus more on substrate integrity and bonding strength. In any case, proper curing and joint protection are essential to maximise performance over time.
Practical scenarios: interior showers, kitchens, exterior walls
Different environments demand different mix choices. In showers and wet areas, grout with polymer modifiers or epoxy variants offers superior moisture resistance and easier cleaning. For exterior walls or historical masonry, traditional mortar with lime can provide better workability and movement accommodation, though sealing strategies should be considered to protect against water ingress. In kitchens, high-traffic floors benefit from tougher grout formulations and well-graded sand to resist wear. The goal is to align the material properties with environmental exposure, movement tendencies, and cleaning regimes. Grout Maintenance emphasizes selecting products that balance ease of installation with long-term durability.
Mixing ratios and workability: practical guidelines
Mortar ratios commonly vary by application, substrate, and climate. A typical starting point is a moderately cement-rich mix with enough lime and sand to achieve workable plasticity and bond. Grout ratios focus on delivering a dense, fillable consistency that can still be worked into joints without voids. For DIYers, begin with manufacturer-recommended starting points and adjust based on mix consistency, tool slack, and the width of joints. Slower weather and higher humidity call for larger tolerances in mix amounts and extended open times. Note that polymer-modified mortars and grouts often allow more forgiving water content, which helps beginners achieve consistent results.
Curing, movement, and crack prevention
Curing is a critical step for both mortar and grout ingredients. Mortar gains strength as cement hydrates, while grout develops its final properties during cure. Movement joints in masonry and tile installations help absorb expansion and contraction that occur with temperature changes or moisture fluctuations. Without proper movement accommodation, both mortar and grout can crack. Use appropriate joint spacing, follow substrate preparation steps, and maintain stable curing conditions. Sealing grout joints after cure can further minimize moisture intrusion and staining, especially in wet areas. Grout Maintenance highlights that curing practices significantly influence long-term outcomes and user satisfaction.
bodyBlocks/12:
Quick-start checklist for DIYers
- Define the project: masonry base vs tile joints to determine mortar vs grout needs.
- Choose products: polymer-modified mortars and grouts for typical home installations; epoxy grout for high moisture or chemical exposure.
- Prepare substrates: clean, dry, and flat surfaces with appropriate backer materials.
- Mix in batches: follow manufacturer guidance to ensure consistent texture and workability.
- Apply in stages: mortar for bonding, grout for joints; allow proper curing time between steps.
- Seal where appropriate: grout joints often benefit from a penetrating sealer after cure.
- Test small areas: verify flow, bond, and finish before committing to the whole project.
- Clean up promptly: remove excess material to minimize staining and cleanup effort.
bodyBlocks/13:
Comparison
| Feature | Mortar | Grout |
|---|---|---|
| Core function | Binds masonry units for structural stability | Fills and seals joints between tiles |
| Typical binder | Cement + lime with sand; water added as needed | Cementitious binder with sand; polymers often included |
| Aggregate size | Coarser sand for strength; supports bonding | Fine to medium sand for smooth joints |
| Water resistance | Moderate unless reinforced by lime or additives | Higher with polymer modifiers; epoxy variants offer best resistance |
| Ease of application | More forgiving for substrate irregularities | Requires careful tool control to avoid voids |
| Best-use scenarios | Structural masonry, exterior walls, brickwork | Tile installations: floors, walls, showers |
Pros
- Provides strong structural bonding for masonry
- Seals joints when properly installed and cured
- Polymer-modified variants improve adhesion and flexibility
- Epoxy grout offers superior chemical resistance in wet environments
What's Bad
- Mortar can crack if joints move or cure is improper
- Cementitious grout can stain without proper sealing
- Epoxy grout requires careful mixing and cleaning to avoid haze
- Some polymer-modified options are more expensive
Polymer-modified cementitious systems strike the best balance for most DIY tile projects; use epoxy grout for high-moisture or chemical-exposure zones.
For typical home installations, polymer-modified mortar and grout provide reliable strength and durability. Reserve epoxy grout for bathrooms or kitchens where moisture and staining risk are highest, or where chemical exposure is likely.
Got Questions?
What is the main difference between mortar and grout ingredients?
Mortar ingredients are designed for bonding and supporting masonry structures, using cement, lime, and sand. Grout ingredients focus on filling and sealing joints between tiles, typically using a cementitious binder with fine to medium sand, and often polymers for strength.
Mortar bonds units; grout seals joints. The key difference is function, driven by their cementitious makeup.
Can I substitute grout for mortar in tile installations?
No. Grout cannot replace mortar for bonding masonry units. Mortar provides structural adhesion, while grout is designed to fill joints. Using grout in place of mortar can lead to movement, cracking, and failure of the installation.
Grout is for joints, mortar for bonding. Substituting one for the other isn’t recommended.
Are there polymer-modified mortars?
Yes. Polymer-modified mortars incorporate polymers to improve adhesion, flexibility, and resistance to cracking. They’re a common choice for challenging substrates and areas with movement or moisture exposure.
Yes, polymer-modified mortars help with durability and ease of installation.
What grout type is best for showers?
For showers, polymer-modified cementitious grout or epoxy grout are preferred due to better moisture resistance and easier cleaning. Epoxy grout is especially resistant to staining and chemicals.
In showers, go with polymer-modified grout or epoxy for best moisture resistance.
Do cementitious grouts need sealing?
Sealing cementitious grout is recommended in many homes to reduce water absorption and staining. Sealing is less critical for epoxy grout, which is typically non-porous.
Seal most cementitious grouts to prevent staining and moisture damage.
The Essentials
- Use mortar for bonding masonry units and grout for joints
- Polymer-modified variants improve performance in moisture-prone areas
- Epoxy grout offers best chemical resistance but is harder to install
- Sand grading and cure conditions influence final results
- Always seal cementitious grout to reduce staining and water ingress