Grout or Caulk Around Shower Drain: A Practical Comparison
An analytical, homeowners-focused comparison of using grout vs caulk around shower drains, covering installation, maintenance, and best practices for durability and mold prevention.

Grout around the shower drain offers durability in tile joints, while caulk at the drain flange provides a flexible water seal. For most showers, a hybrid approach—epoxy grout in surrounding joints with silicone caulk at the drain edge—delivers the best balance of durability and waterproofing.
Why the drain-edge decision matters
Choosing the material at the shower drain edge affects waterproofing and long-term tile integrity. The seam around the drain is particularly exposed to water, soap, and temperature changes, so the wrong choice can lead to cracking, mildew, and leaks. According to Grout Maintenance, the optimal solution depends on substrate stability, how the shower is used, and how readily you want to reseal in the future. The Grout Maintenance team found that a hybrid strategy—grout in the tile joints surrounding the drain, with silicone caulk at the drain flange—offers a balanced blend of rigidity and flexibility. This arrangement reduces visible cracking while keeping a reliable water seal. For homeowners, considering the edge geometry around the drain—whether it is a corner drain, a pan edge, or a modern linear drain—helps determine the most effective approach. In practice, epoxy grout is often chosen for the tile joints around the drain for durability, paired with a silicone seal at the flange to accommodate substrate movement. By thinking about movement, moisture exposure, and maintenance intervals, you can build a plan that minimizes leaks and mildew while preserving tile aesthetics.
Material Basics: Grout vs Caulk
Grout and caulk are not interchangeable in all shower-edge situations. Grout is a cementitious or epoxy material used to fill the gaps between tiles. It provides color options and strong rigidity, but exposed joints can crack under movement or differential settling. Epoxy grout, in particular, is designed for moisture resistance and stain resistance, but it remains a rigid barrier that does not flex with substrate movement. Caulk (or sealant) is typically silicone-based in modern bathrooms. It remains flexible, tolerates movement, and offers excellent water resistance at seams around fixtures. Mildew-resistant silicone caulk is common in shower environments. However, caulk can degrade, shrink, or discolor over time and must be replaced periodically. A common best practice is to use epoxy grout in the tile joints near the drain while applying silicone caulk at the exact drain flange to accommodate substrate movement and maintain a waterproof seal. The keyword grout or caulk around shower drain frames this decision clearly: mix and match the materials to achieve both durability and flexibility, not merely aesthetics.
Movement, Moisture, and Failure Modes
In confined shower spaces, even small substrate movements can crack grout or wear away caulk. Water intrusion at the drain seam is a leading cause of mildew behind walls and under tiles. The Grout Maintenance Analysis, 2026, notes that the most durable installations use a layered approach: rigid joints in wider gaps and flexible seals at the most exposed seams. Movement at the drain flange can arise from substrate settling, temperature cycles, or heavy foot traffic. Compressive forces around the drain push against both grout and caulk, so proper detailing—such as a bead of silicone along the drain edge and cured epoxy grout in surrounding joints—helps keep moisture out while preserving tile integrity. The Grout Maintenance Team emphasizes that keeping the drain edge free of cracks and ensuring the seal remains continuous are the two most important water-control measures in a walk-in shower.
Installation Scenarios and Practical Layout
When planning the layout, start with how the drain interacts with surrounding tile. If tile backsplashes or surrounding walls create a tight edge at the drain, silicone caulk along the flange provides a forgiving seal. For most standard showers with a tile field around a central drain, the recommended practice is to grout the tile joints up to — but not into — a narrow gap around the drain flange, then seal that gap with silicone. Be sure to prime and clean the surface before applying either material. If using epoxy grout in the joints for durability, mixing and curing times should follow product instructions to avoid shrinkage or cracking. For maintenanceability, color-matched silicone caulk around the drain can help with aesthetics and inspection. The hybrid approach is particularly practical for pans with slight movement, as it reduces the risk of cracks propagating through the grout while keeping a tight water seal.
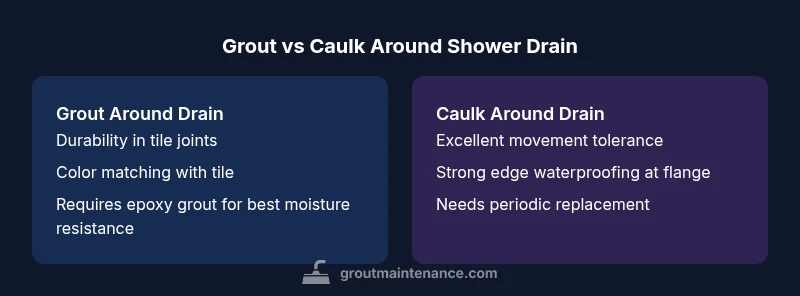
Pros of Grout Around the Drain
- High durability in tile joints, especially when using epoxy grout in moisture-prone areas
- Color consistency with surrounding tiles for a seamless look
- Long-term wear resistance when joints are well-sealed and maintenance is timely
- Lower need for periodic resealing compared to some silicone joints when epoxy is used
Pros of Caulk Around the Drain
- Excellent flexibility to absorb substrate movement and thermal expansion
- Strong, continuous water seal at the exact drain flange
- Easier to replace in localized areas without regrouting nearby tiles
- Less prone to chipping or crumbling in dynamic shower environments
Best Practices: Hybrid Approach and Maintenance
The most practical and durable strategy for most showers is a hybrid system: epoxy grout in the tile joints around the drain plus silicone caulk at the drain flange. This approach balances rigidity with flexibility. The Grout Maintenance Team notes that this combination reduces crack propagation and dries efficiently, helping to prevent mold behind the shower wall. When selecting products, choose mildew-resistant silicone and epoxy grout that is compatible with your tile substrate. Follow manufacturer instructions for preparation, curing times, and cleaning. Maintain the seal by inspecting for cracks or gaps every 6-12 months and re-seal or re-grout as needed. For color-matching, consider tinted silicone to blend with tile grout; for durability, prefer epoxy grout in the surrounding joints. The key is to maintain a continuous, clean edge around the drain and document a routine maintenance schedule.
Maintenance Schedule and Common Issues
Shower drain edges require routine inspection. Look for hairline cracks in grout around the drain and discoloration or mildew staining on caulk. Clean with non-abrasive cleaners and avoid harsh solvents that can degrade silicone. Re-seal with mildew-resistant caulk or re-grout the surrounding joints when you notice gaps, cracks, or water seepage. The decision to re-caulk or re-grout depends on the observed condition, but a typical interval is every 2-5 years for most bathrooms, depending on use, water quality, and cleaning frequency. Always remove old material completely before applying new sealant or grout to ensure proper adhesion. Keep a plan for periodic evaluation and a log of maintenance to catch issues early and protect the substrate.
DIY vs Professional Installation and Costs
DIY can be feasible for small jobs around a shower drain, but working with epoxy grout and silicone caulk requires careful surface preparation and proper curing times. Hiring a professional can ensure proper substrate preparation, seam detailing, and color matching. Costs vary by region, material quality, and labor, but a professional install typically provides a longer-lasting seal when movement and moisture are significant concerns. If you decide to DIY, invest in quality tools, follow safety instructions, and treat any mold or mildew growth promptly. Regular inspection and timely resealing are essential regardless of who performs the installation to maintain a leak-free shower.
Comparison
| Feature | Grout around drain | Caulk around drain |
|---|---|---|
| Flexibility | Low (rigid grout in joints) | High (silicone caulk) |
| Moisture Resistance | Good with epoxy grout in surrounding joints; edge seal must be maintained | |
| Maintenance Frequency | Typically longer-lasting with epoxy grout; resealing less often | |
| Installation Complexity | Moderate to high (grouting process, curing time) | Moderate (caulk application) |
| Best For | Low movement; epoxy grout in joints around drain | |
| Cost/Upfront | Depends on epoxy grout choice; can be higher upfront | |
| Repair Ease | Replacing grout can be more involved | |
| Aesthetic Integration | Seamless look with tile; color-matched epoxy |
Pros
- Durable tile joints with epoxy grout in surrounding area
- Flexible sealer at drain flange prevents leaks from movement
- Easier targeted replacement of caulk without redoing tile
- Color-matching options for a cohesive look
What's Bad
- Grout can crack with movement if expansion joints are not used
- Epoxy grout is harder to work with and costlier
- Caulk around drains degrades over time and may require periodic replacement
- Mildew can develop behind poorly maintained caulk or grout when neglected
Hybrid approach wins for most showers
Epoxy grout around the tile joints near the drain plus silicone caulk at the drain flange provides durability and a flexible seal. This combination minimizes cracking and moisture intrusion while keeping maintenance reasonable.
Got Questions?
What is the best material to seal around a shower drain?
Most showers benefit from a hybrid approach: epoxy grout in the surrounding tile joints and silicone caulk at the drain flange. This balances durability with flexibility and reduces the risk of leaks.
A practical setup is epoxy grout in the joints near the drain, with silicone caulk right at the drain edge to handle movement.
Can I replace grout with caulk around the shower drain without removing tiles?
In many cases you can seal the drain edge with caulk without removing tiles, but this is best done after removing old caulk and cleaning the joint thoroughly. If the surrounding grout is intact and tight, you may seal just the edge.
Yes, you can seal around the drain with caulk, but you’ll want to clean and prepare first and know that this won’t fix issues behind the grout.
Is epoxy grout recommended around a shower drain?
Epoxy grout offers superior moisture resistance and durability in wet areas, making it a good choice for the tile joints near the drain when you want a long-lasting installation.
Epoxy grout around the drain joints lasts longer and resists moisture better, but it can be trickier to work with.
How often should I replace caulk around a shower drain?
Most homeowners reseal every 2–5 years, depending on wear, water quality, and cleaning routines. Look for cracks, gaps, or mildew growth as signs it’s time to reseal.
Caulk around the drain should be checked yearly and replaced every few years if you notice cracking or mildew.
What maintenance steps prevent mold around a drain seam?
Regular cleaning with mild, non-abrasive cleaners, ensuring good ventilation, and resealing seals when you see moisture intrusion or discoloration are key steps to prevent mold.
Keep the area clean, dry it after use, and reseal when you see stains or mold growing around the drain seam.
What signs indicate I need to re-seal around the drain?
Visible cracks in grout, gaps at the drain edge, or mildew on caulk are clear indicators that resealing or re-grouting is due.
If you see cracks or mold around the drain, it’s time to reseal or re-grout.
The Essentials
- Adopt a hybrid approach for most showers
- Use epoxy grout in tile joints around the drain
- Seal the drain flange with silicone caulk to absorb movement
- Inspect seals regularly and reseal/regrout as needed
- Consider professional help for complex drain configurations